Flowers

large centerpiece graduation party books

College Graduation Party decor

I’m sharing some photos from a college graduation party that I did for a friend.  I helped with the overall look and decor.  So flowers, centerpieces, etc.  For her graduation celebration, she wanted a very sophisticated look and feel and I think we were able to achieve that.

red roses mercury glass

The starting point was her school colors, which were red and silver. On the tables, red roses were arranged in mercury glass vases in various shapes and sizes next to a pile of red vintage books tied with beautiful satin ribbon set on top of black tablecloths. I also used a small mercury glass vase to hold a votive candle.


It took some time to compile all the books we needed for this look.  I used about 5 books per table. The subject matter did not matter.  There were 15 tables, so we needed 75 books just for the centerpieces.  In total, we used about 100 books for the tables and accents locations like the bar and card table. Table numbers were also framed in a small silver frame. Each table was unique due to the variations in the vases and books.

table centerpiece red and silver
graduation centerpieces red and silver books and satin

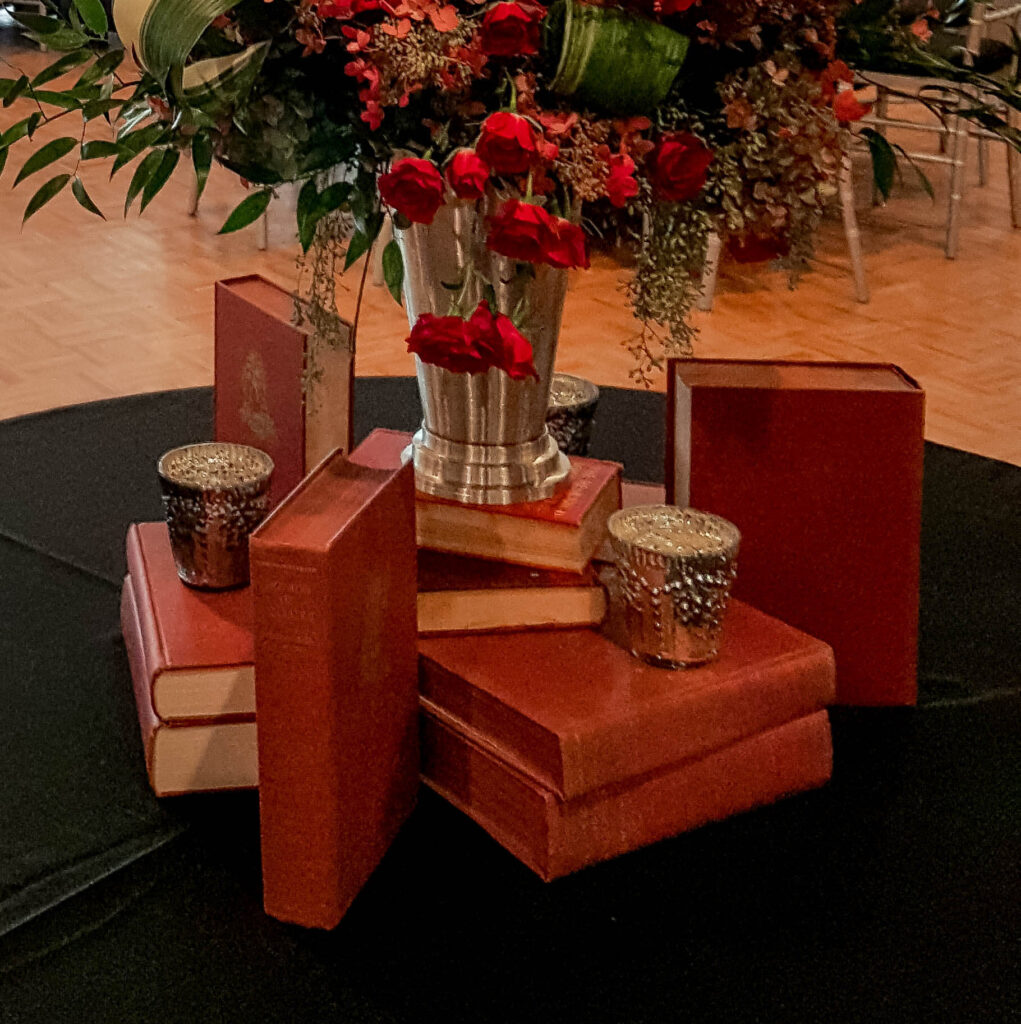
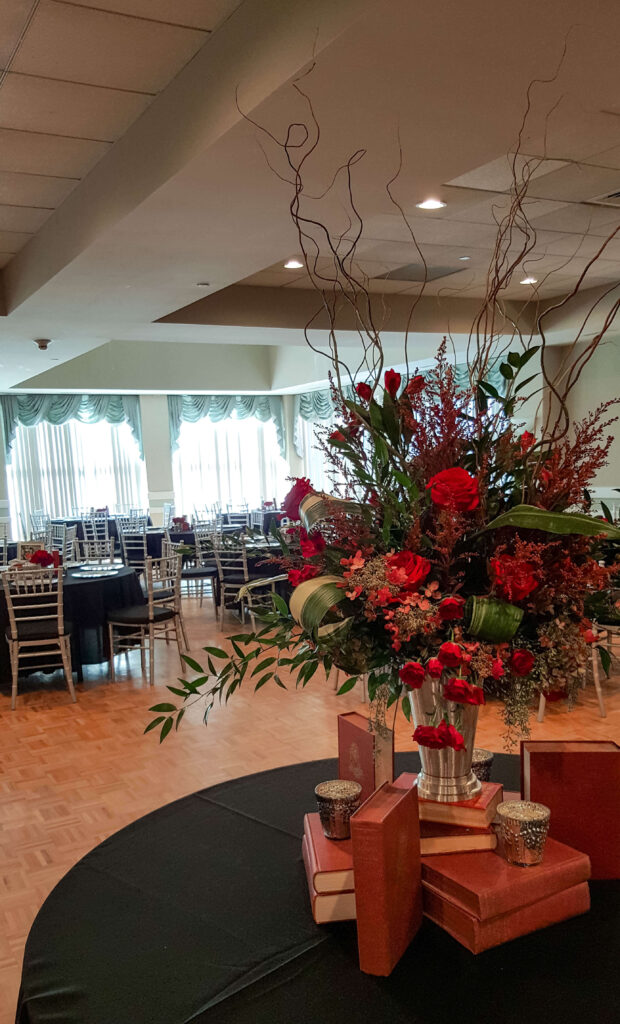
The hors d’oeuvres table also featured a large showpiece arrangement.  I found a large mint julep-style vase at the goodwill that served as the most perfect vessel for this arrangement.  I also found about 8 large red vintage references for this table.  They needed to be large in scale to complement the large arrangement at the base and then accented with mercury glass vases with votive candles inside.


centerpiece detail books mercury glass
I used red roses, regular and spray. Curly willow for height, alstromeria, astilbe, some early fall hydrangea in a creamy pink, and lots of greens for texture.
large centerpiece graduation party books

I forgot to get a picture but the cardboard was a vintage briefcase, which turned out beautiful.


It was a beautiful sophisticated look, I loved how it turned out.


College Graduation Party decor Read More »

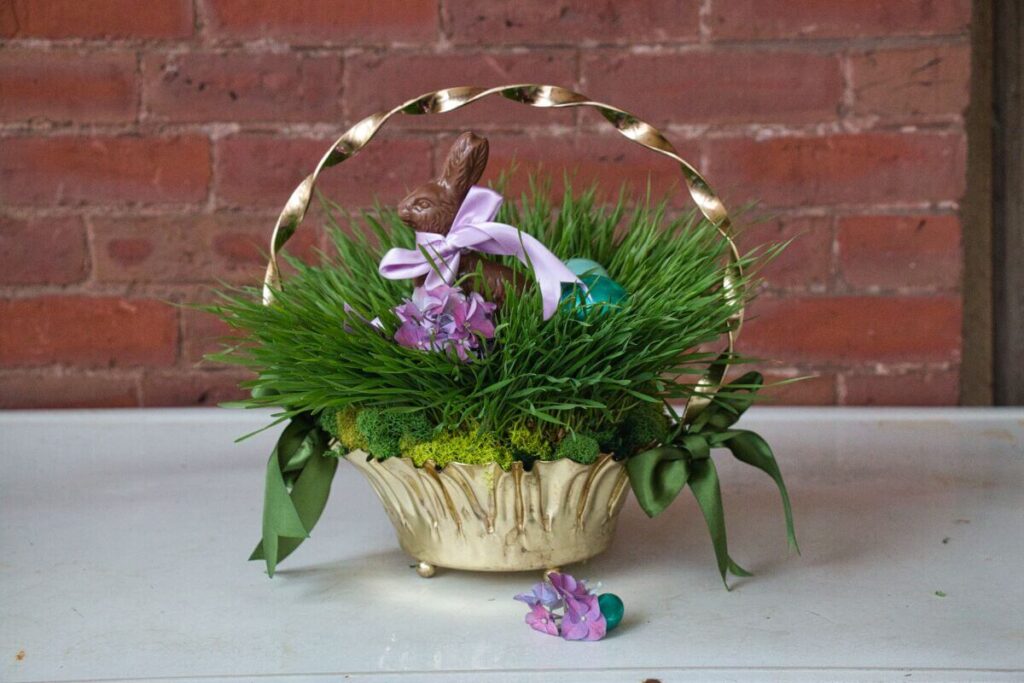
easter bunny in wheat grass

Growing your own real Easter Grass

easter bunny in wheat grass

I have wanted to grow grass for Easter baskets, and I finally did it this year. More importantly, it truly turned out beautiful. I have a long list of crafts and DIY projects. It will take me until I am 90 before I complete them all, but I am happy to say that I can check this one off my list. And I will do it again. What screams spring more than grass?

I could see it in my mind’s eye. A beautiful basket of lush green grass, with a lovely chocolate bunny nestled in the middle. I’m so happy that this DIY came out just as I had envisioned it. This is a great thing to do with kids because it’s easy and has beautiful and gratifying results.

wheat great easter decoration

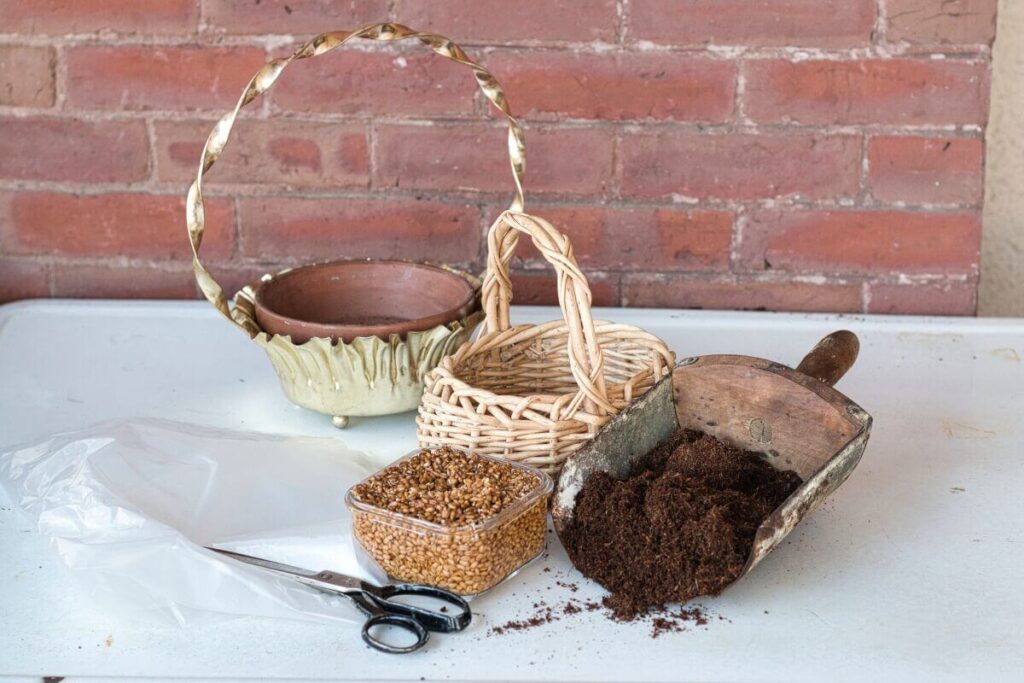
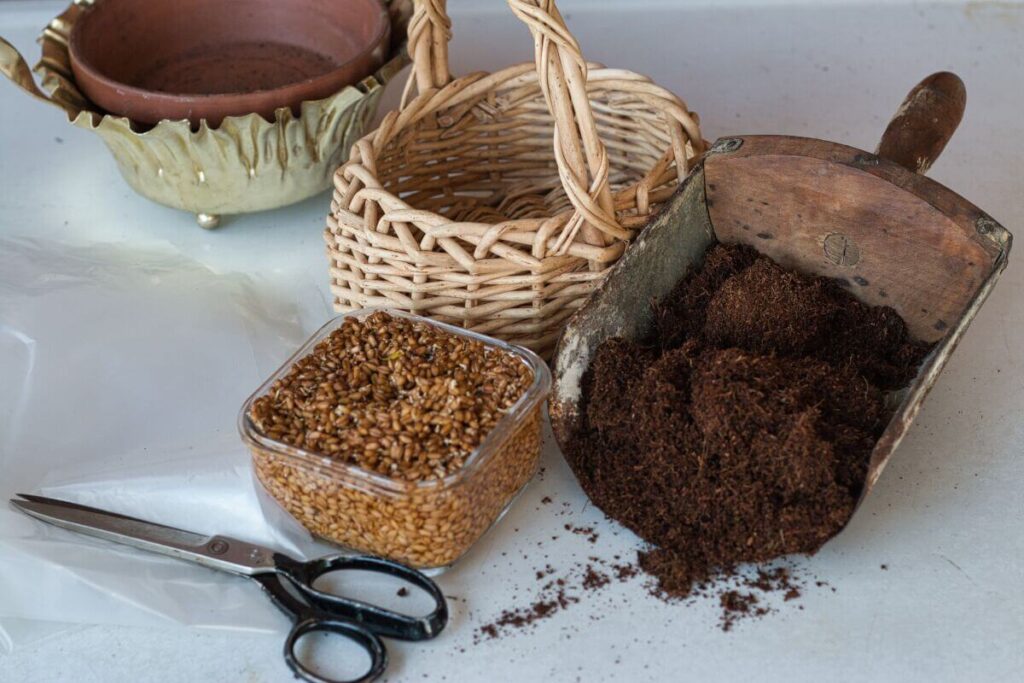
Supplies:

  • Container of your choice
  • Wheatgrass
  • Organic Coco Coir Potting Soil
  • Plastic to lined container if needed
  • Scissors

How to grow your Easter Grass

This is the easiest thing you will ever do with the most amazing result. 

Step 1:  

soak wheatgrass seeds for 1-2 days.

Step 2:  

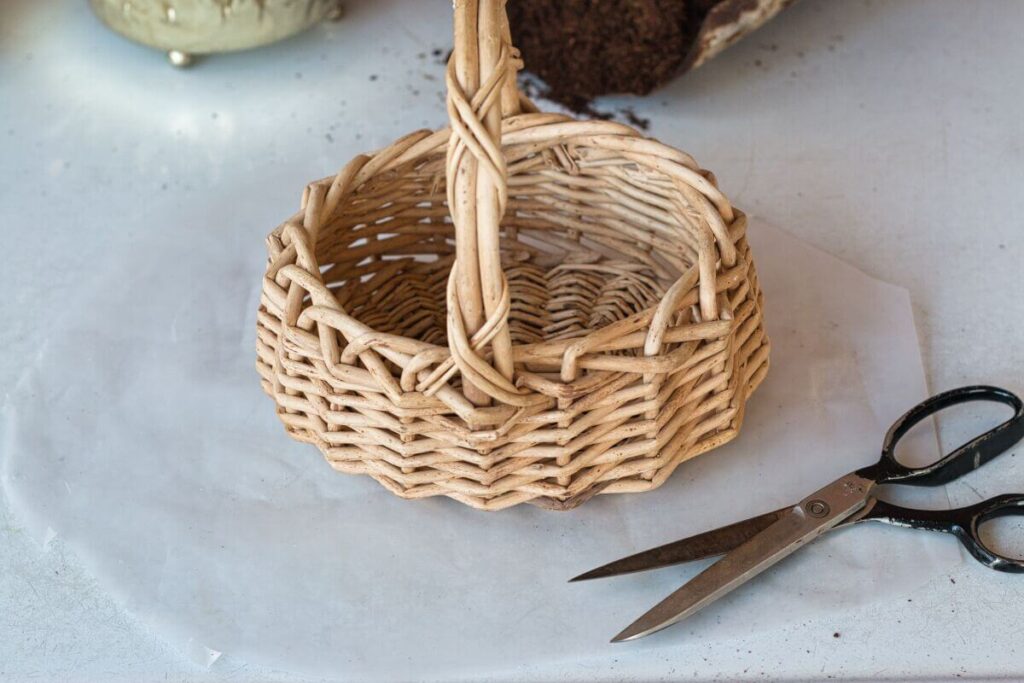
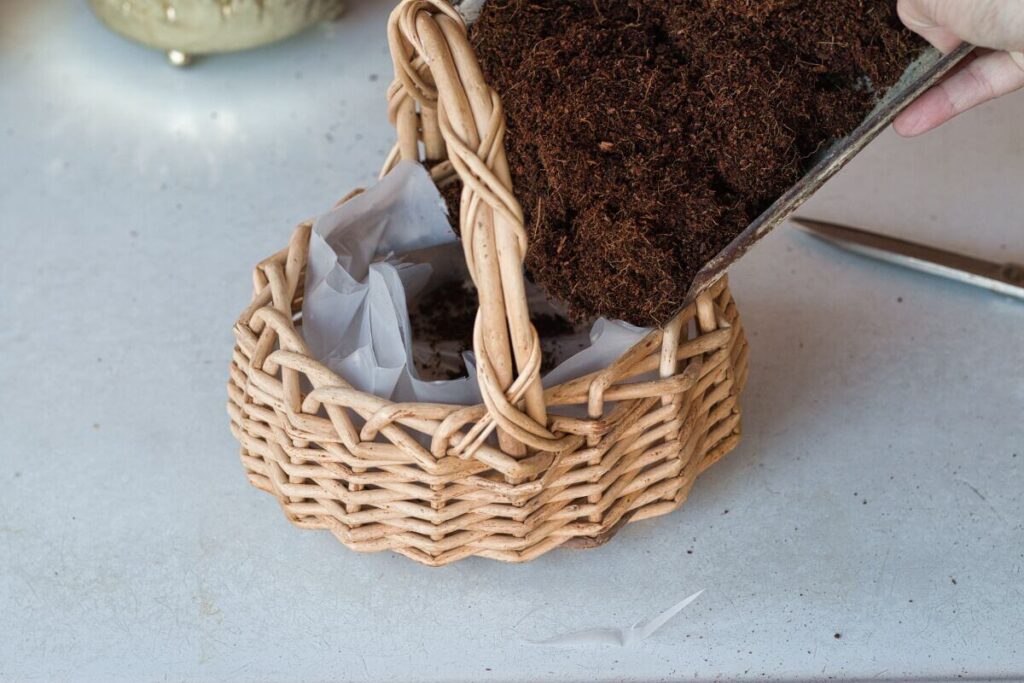
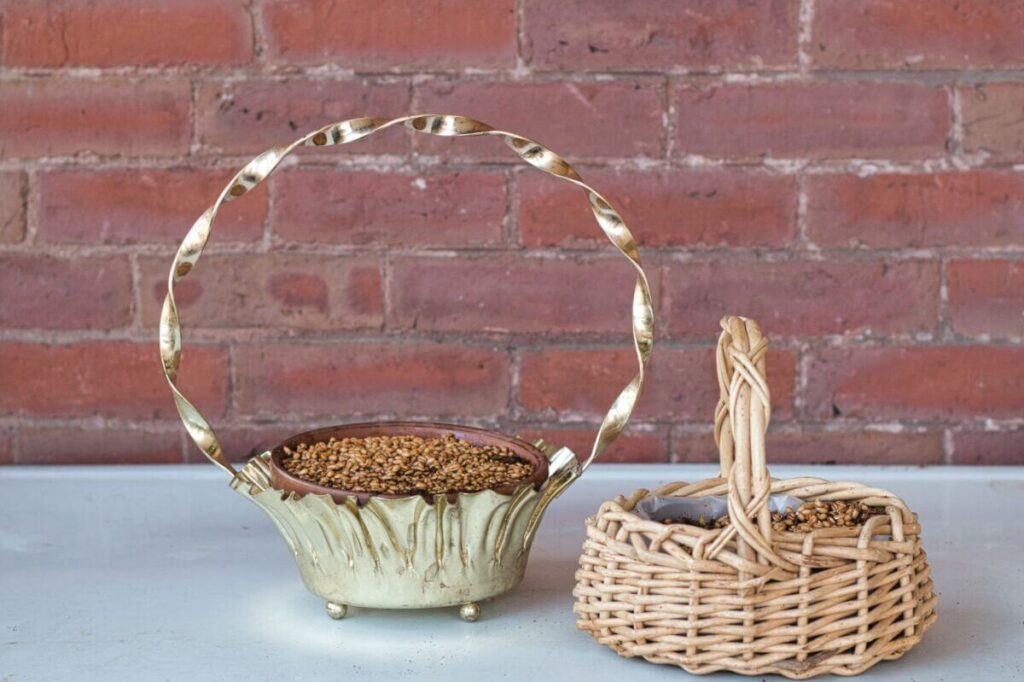
Prepare your container.  I had to line my basket with plastic.  And my metal basket was lined with a terracotta pot.  I could have also used a plastic liner, but the terracotta fit perfectly.  Once your container is ready, fill it with potting soil.

wheat grass for decor
tutorial grow wheat grass easter basket
potting soil for wheat grass

Step 3:

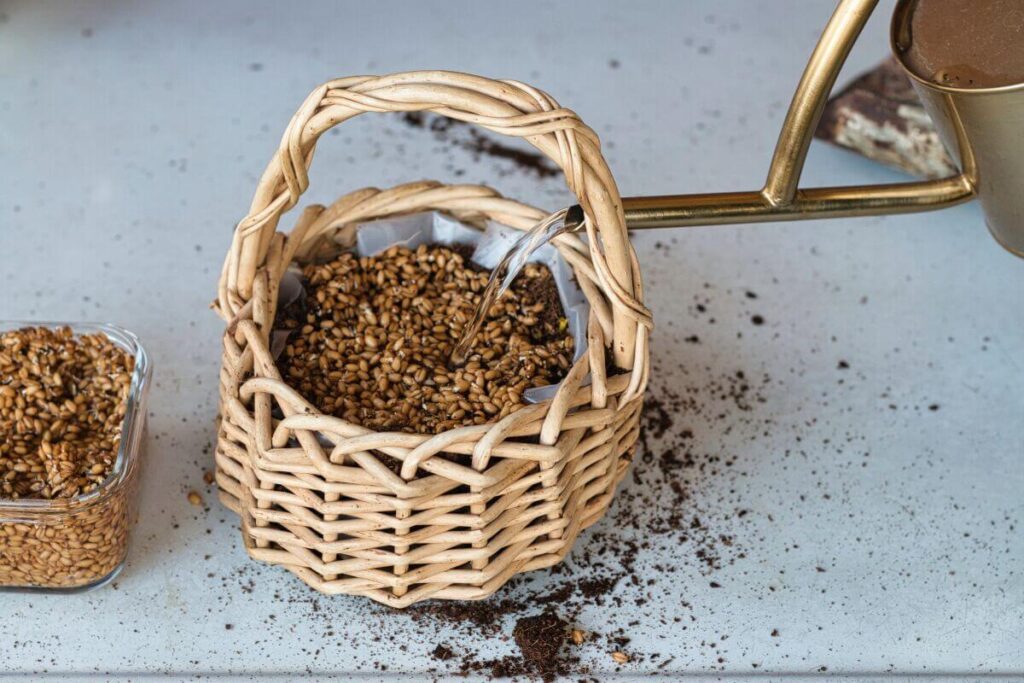
Sow the wheatgrass in potting soil and water (make sure to keep the soil moist), place it in a sunny location and wait.  That’s it.

watering wheat grass
mcm basket for decor metal

Because you have already soaked the wheatgrass, they are plump and full of water, ready to burst and take root. The seeds should start sprouting in about 3 to 5 days.

growing wheat grass for decore
wheat grass for decoration

then the magic happens

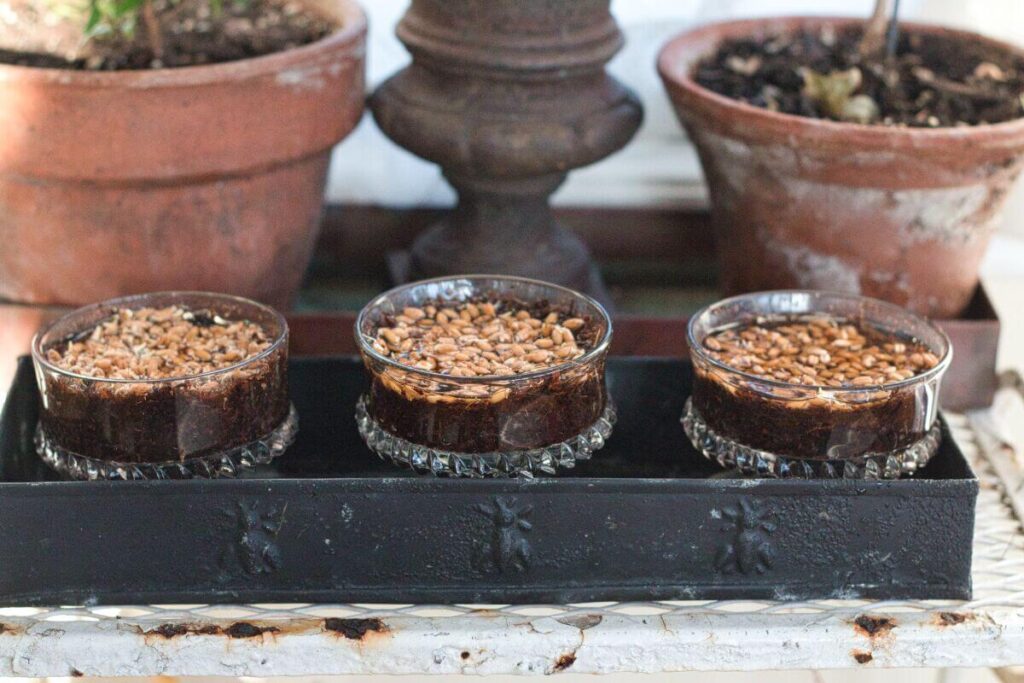
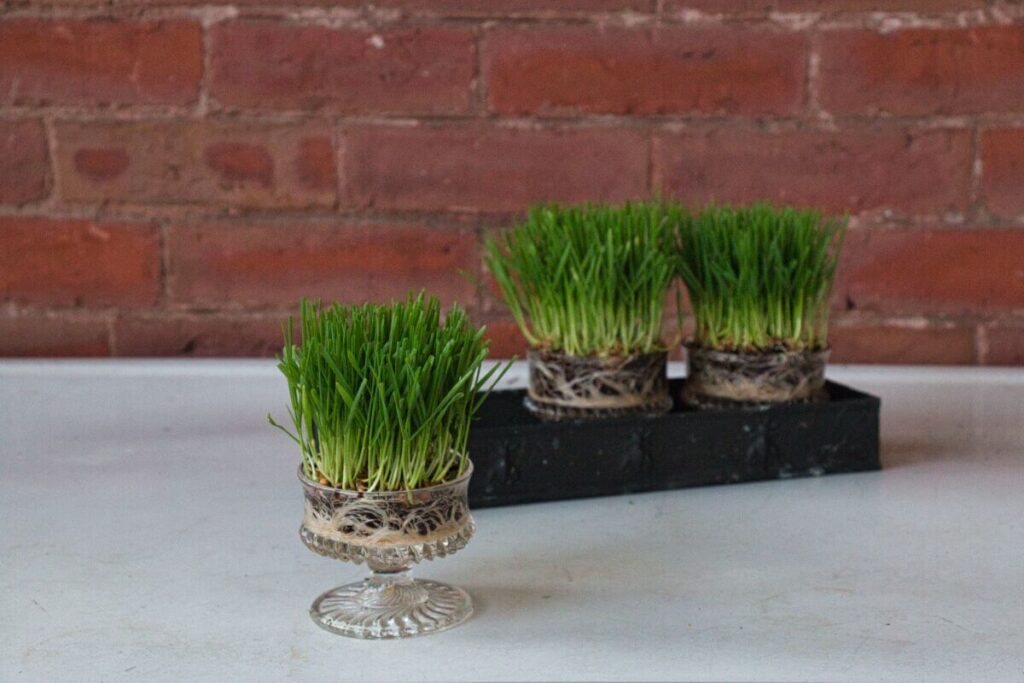
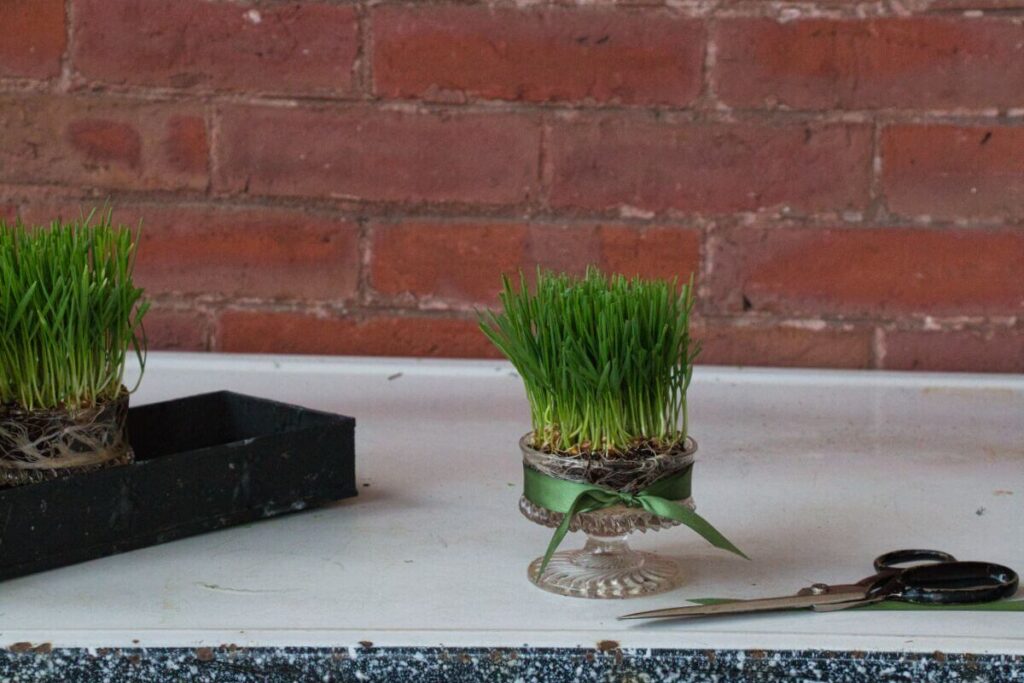
grow wheat grass dessert dish
centerpieces with wheat grass
wheat grass for table

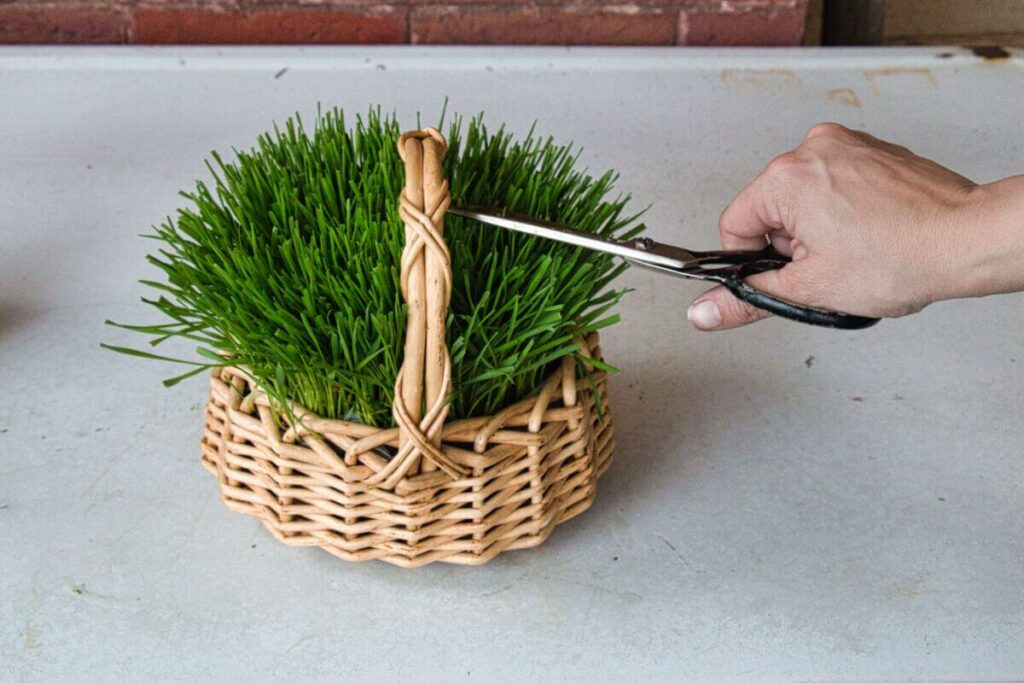
Once it starts growing, it will keep growing, and at some point, your will need to trim your grass. Wheatgrass is full of nutrients and can be grown to eat.

growing wheat grass trimming
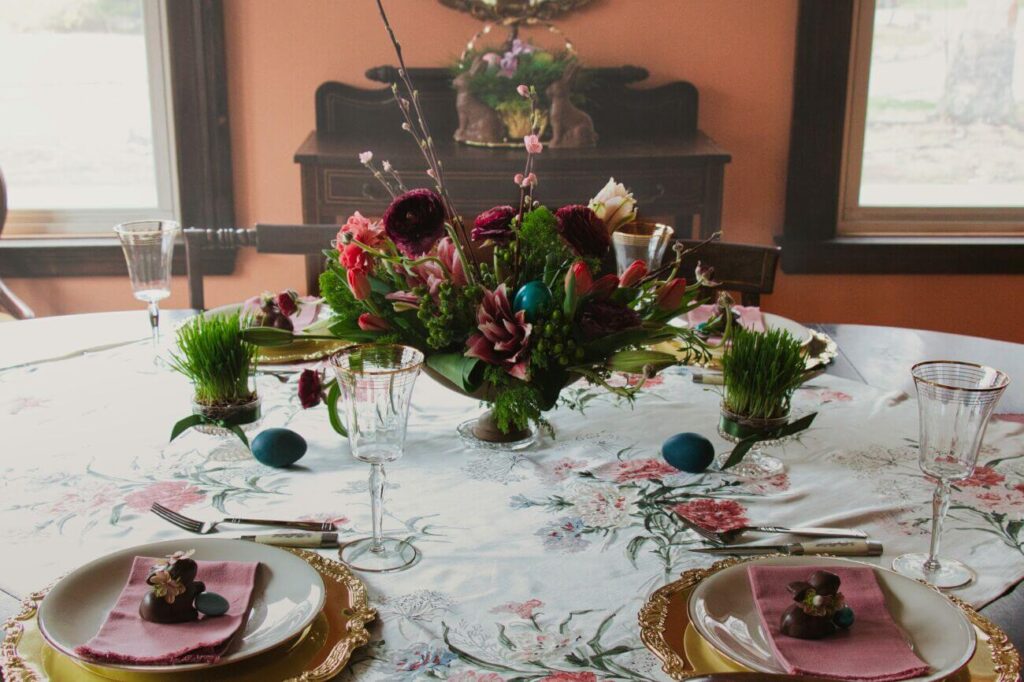
easter tablescape
Easter grass grown in dessert glasses on my Easter table.
easter bunny in wheat grass

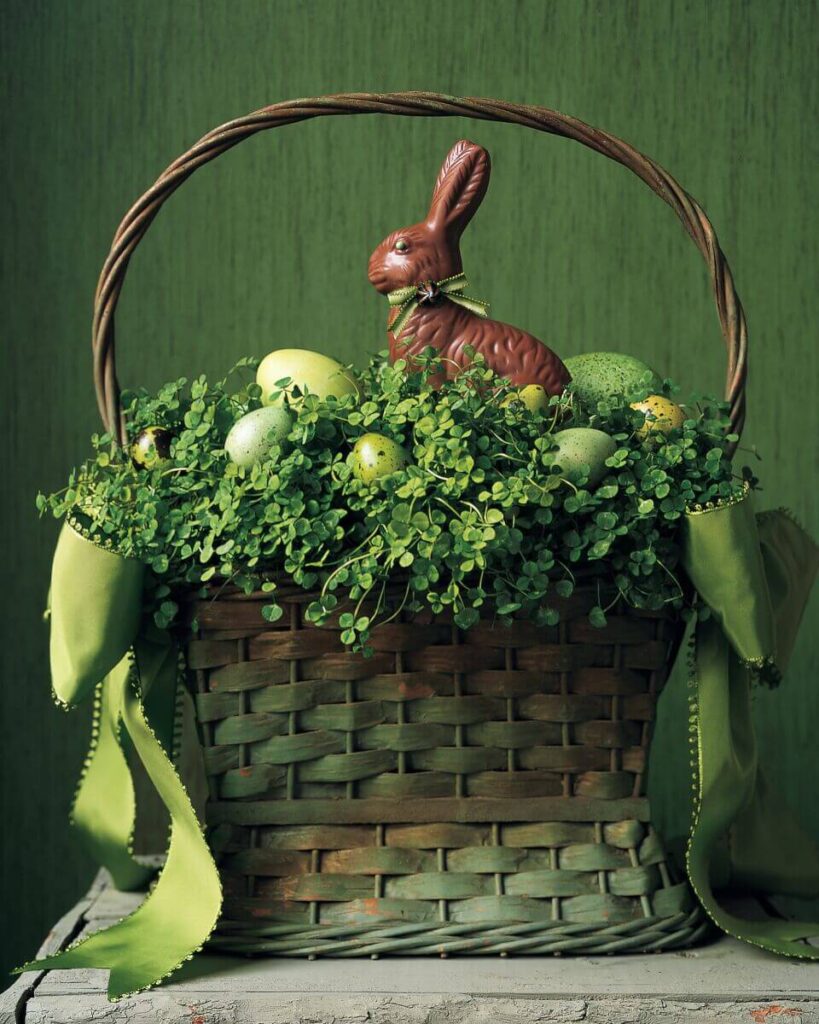
I added a chocolate bunny and some eggs to the mcm metal basket.  Of all the containers this one was my favorite, it reminded me of a Martha Stewart cover.  It’s not exactly the same, but you can see the resemblance.  The shamrocks in Martha’s basket are amazing maybe I will try that next year.

martha stewart green basket

I’m so happy with the way they turned out.  Timing is everything for this craft, you need to give yourself 4 weeks to get these results, but they are absolutely worth it.

Growing your own real Easter Grass Read More »

antique trophy

Valentines Day Floral Arrangement with vintage silver trophies

Having worked as a florist for over 10 years, I can honestly say that red roses are my least favorite flower. Talk about predictable. There are just too many beautiful flowers in this world, why say I love you with red roses? Why not give a jewel-tone arrangement of orchids and lilacs or a pastel arrangement of tulips and peonies?  

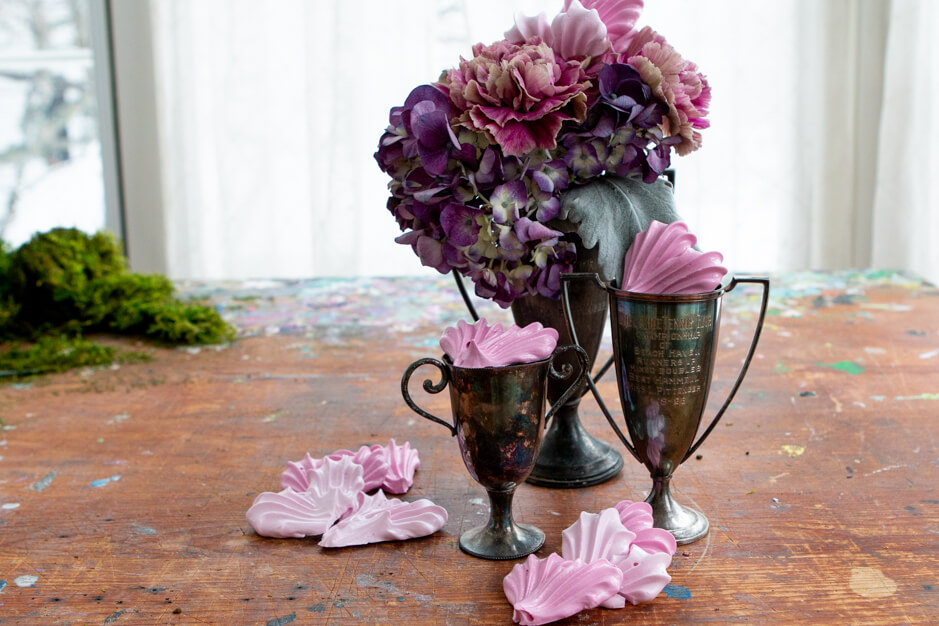
I created two valentine arrangements for myself, and both are supermarket flowers, but more importantly, not a red rose in sight.

Romantic Pinks and Purples

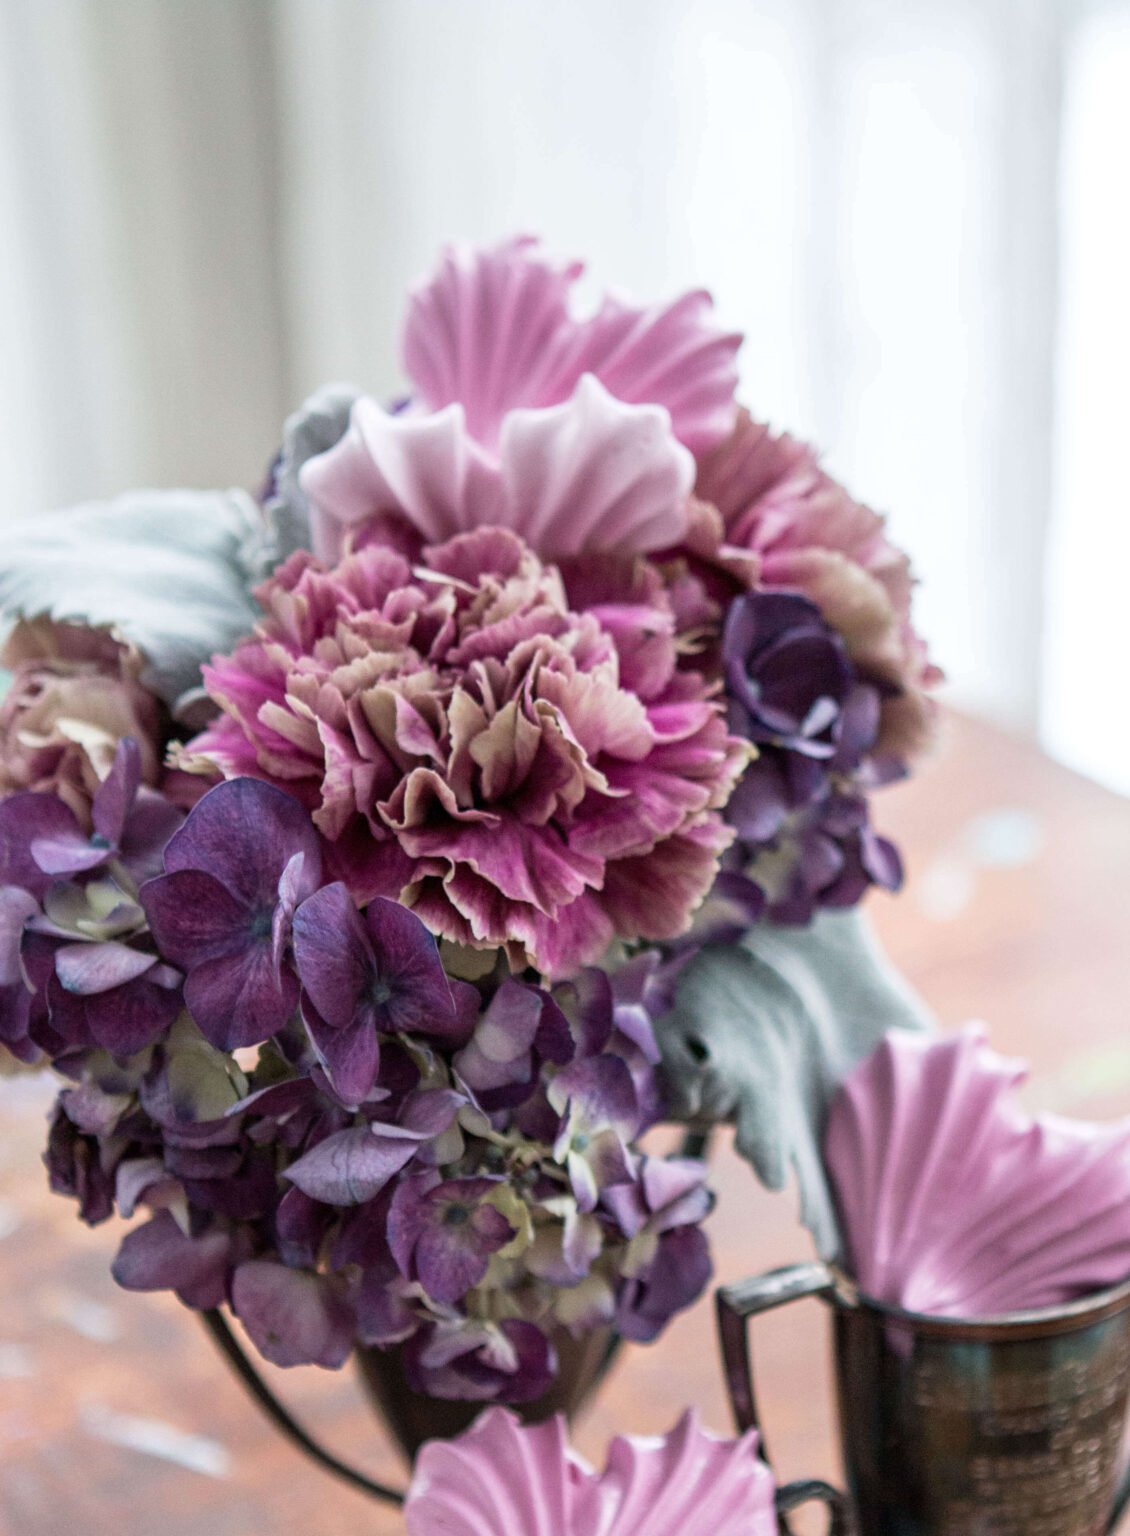
On a recent trip to WholeFoods, I stopped dead in my tracks when I saw these fantastic carnations. They had a bad wrap for a long time. They were considered cheap and common. But boy, have carnations come a long way. This carnation was a hybrid creation, two-tone fuchsia pink and dusty mauve. It is just so beautiful, and one of the best things about carnations is that they last a long time. Between the color and longevity, this was a no-brainer.

mauvy pink carnations

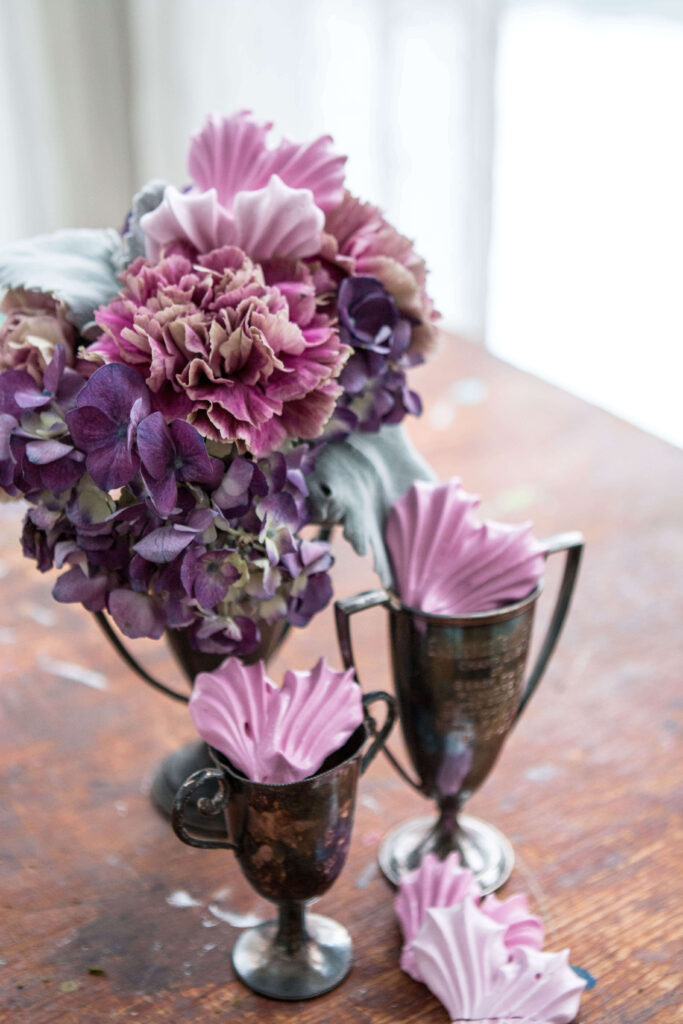
This grocery store flower combination was a bunch of carnations, some beautiful purple hydrangea, and a silver lambs ear. A simple and easy combination.

vintage trophy purple pink flower arrangement

I also picked up some pink heart meringues. Why? Not sure, but I felt like they would bring another texture and fun element to the arrangement. And it’s a fun way to celebrate love in a non-plastic, eco-friendly way. I am not perfect, but I try my best to celebrate without plastic.


I love how the cool tones all worked together.  

Hot Citrus Hues

valentine roses arrangement

This second arrangement comes from the flower selection at Trader Joe’s.  They really do have a fantastic flower selection, with excellent prices.  There is no reason not to go home with some beautiful blooms for your home.

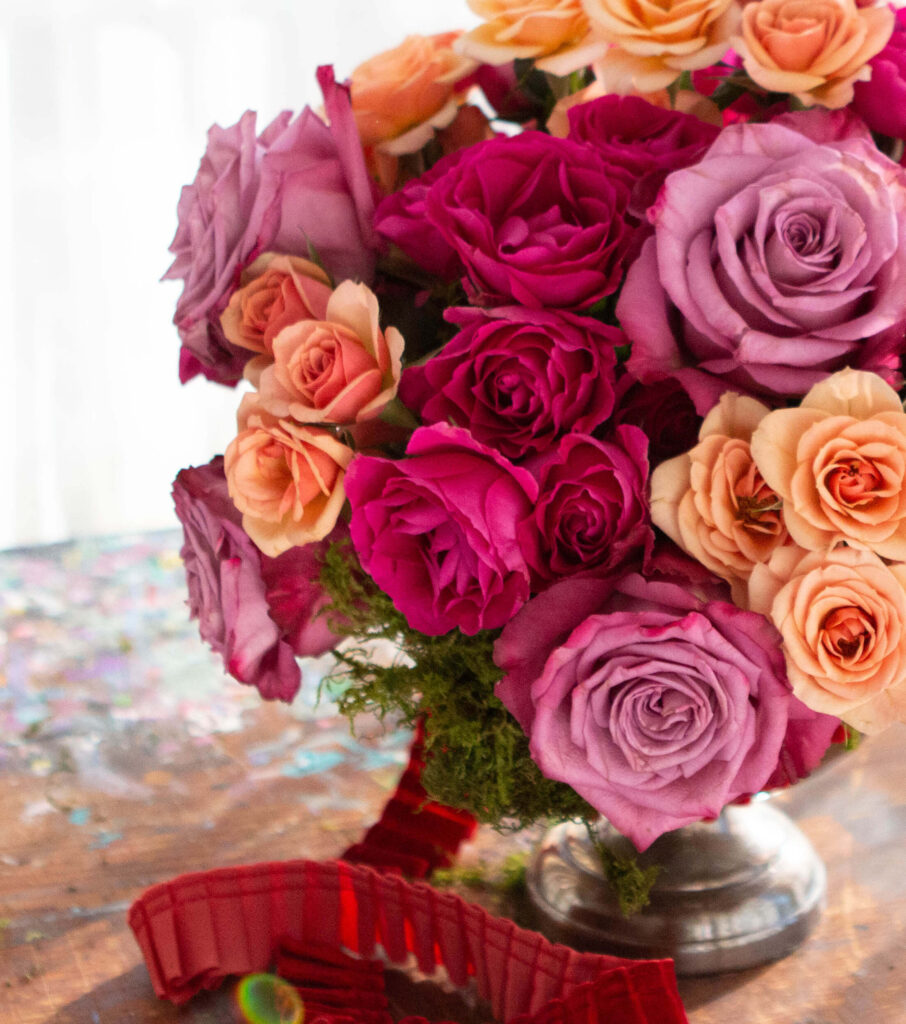
Again I went with a silver-plated trophy vase, but this one is special.  This trophy vase has a cage flower frog top.  It’s comes with its own mechanics for your floral creations!  I went a vibrant selection of roses.  

I used gorgeous purple garden roses and peach and hot pink spray roses, all from my favorite TJ’s. I bought these 3 days before Valentine’s Day, and I was so impressed with the quality of the flowers.  Unfortunately, I underestimated the size of the vase. SOME MECHANICS WERE SHOWING when I was done because I needed more roses to fill this container, but I covered whatever mechanics showed with moss. And at the last minute, I added a little red velvet box pleated ribbon and let it trail off the edge. I loved how it came out.

red velvet box ribbon roses purple

So here are a couple of ideas for Valentine’s Day flowers. I hope you enjoyed and more importantly, I hope you are inspired to celebrate love with a different palette. Happy Valentine’s Day, no red roses here.

Valentines Day Floral Arrangement with vintage silver trophies Read More »

my collection of flower frogs

Collections – My Vintage and Antique Flower Frog Collection

my collection of flower frogs

What is it about collections that bring us so much joy? Is the hunt for the next piece? Is it the thrill of finding that rare piece that you have been searching for forever? Or is it the appreciation for the collection itself? For me, it’s all these things. As a dealer, I have to admit that the hunt is exciting. The rarer the piece, the more exhilarating it is to find it, but I also love displaying them and using them.

I have a few collections (ok, maybe more than a few).  Truth is I have a quite a few collections. I collect vintage Madonna’s and rosaries.  I also collect vintage trophies, vintage Christmas cards, Santa’s, vintage coral, decorating books and my prized flower frog collection.

purple dahlia flower frog
metal japanese flower frog

Having been a florist for many years, flower frogs have always spoken to me. I still consider myself a florist and use my flower frogs all the time in the arrangements I make for my home. Of all my collections, the flower frog collection has probably been the easiest to build. As with all things, the passage of time makes things harder to find, but because most flower frogs are made of metal, they seem to weather the years gracefully. They get better with each year that passes.

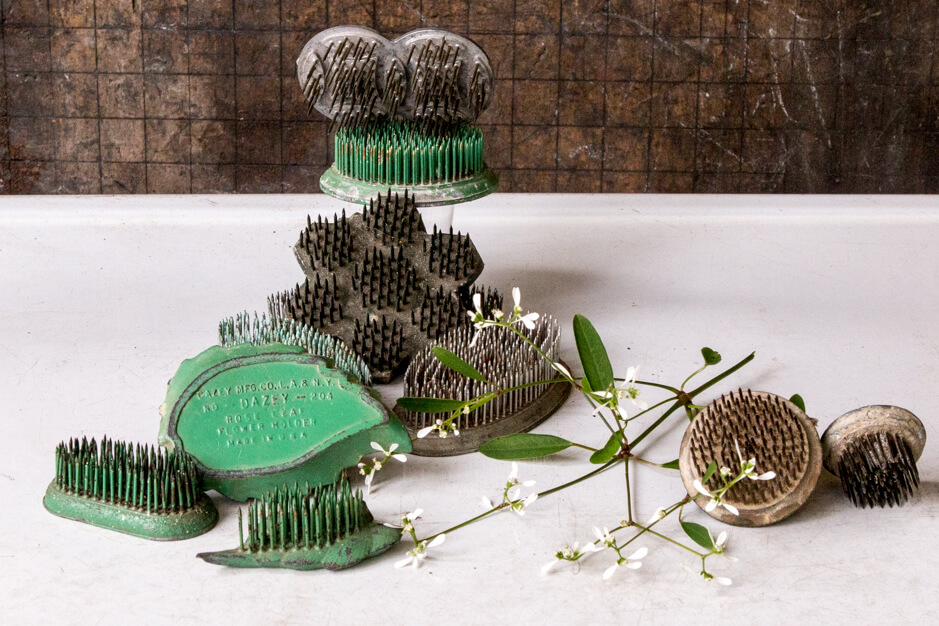
In case you don’t know what a flower frog is. Let me explain.  A flower frog is a type of mechanics used to stabilize the stems of flowers in a vase or container.  

Nobody is certain as to why they are called frogs.  Except that they the do sit in water like frog do.

Flower frogs were used by flower lovers for centuries and were made in different sizes and shapes to accommodate various vessels and flower types. Until the 1950s, when floral foam was invented, and designers stopped using frogs for mechanics. Flash forward to today, people are starting to realize the environmental impact of the foam (which is essential plastic that does not break down), and they are beginning to turn back to frogs and cages for floral mechanics. So much so that they are even being manufactured again because of the high demand for an eco-friendly tool.

I thought I would go over the different categories of flower frogs and, along the way, show you my collection within each category. They range in materials from metal, glass, ceramic, lead, and plastic. Some are very practical in form and material, but older Victorian frogs can be very elaborate and sometimes whimsical.


What are the different types of flower frogs?

stacked vintage flower frogs

Metal Pin Flower Frogs

I think these are the easiest to find. If you go to enough estate sales or yard sales, you will find them pretty easily and often inexpensively. Often you will find round and oval frogs. It’s always fun to find the leaf-shaped and flower-shaped frogs.

Pin frogs are better suited for architectural designs. They are used in the ikebana style of floral design because they are rigid and help achieve the strong lines in ikebana. 

This is a close-up of the Dazey leaf-shaped flower frog. Made by Dazey Mfg. Co.

vintage flower frogs

The round metal frogs look great stacked, and I usually sell them in sets. I prefer to display them stacked. I love how each one has its unique patina, and stacking that patina all together makes them even more irresistible look.

Because they provide a weighted bottom and do not damage the cards like tape, I often use them to display my holiday cards.

group of metal pin flower frogs


Glass Flower Frogs

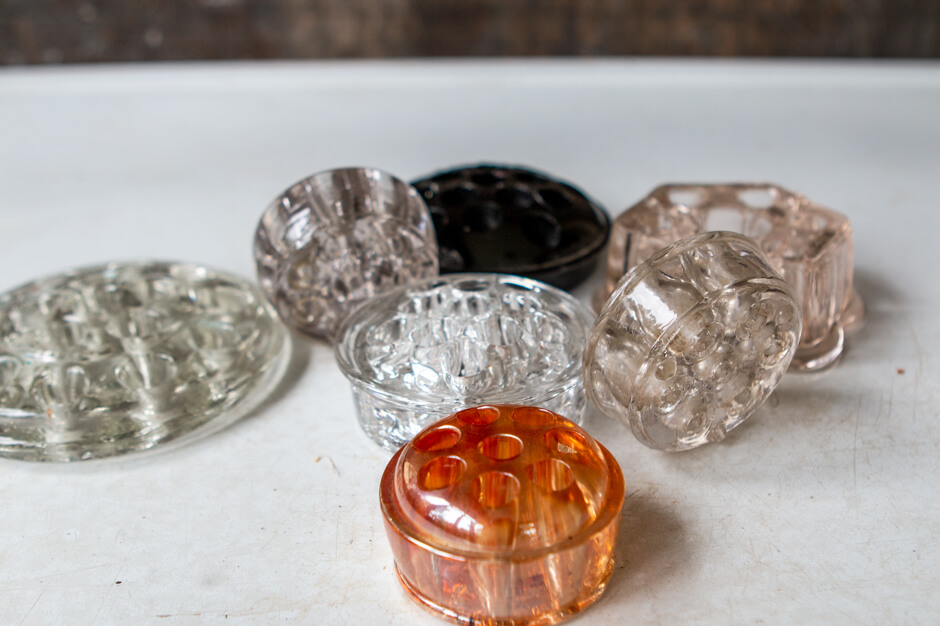
Glass flower frogs are the frogs that I get the most question about. Made of glass, they have wider holes and are almost always round in shape. People often struggle to see how they are used for floral design because the holes are so big. 

They come in different sizes and colors but are generally round, some are flatter, some are more domed in shape.  Sometimes people use them as pen holders, scissor holders or brush holders (makeup or art). I get asked about them so often that I created a tutorial on how I use them in an arrangement, you can find it here. I love using glass flower frogs for bulkier stems; they create a great structure for heavy and or thicker stems, like sunflowers or tulips.

The thick glass makes them virtually bullet proof.  They can withstand a lot of wear and tear.  While I do find them with chips, most of the time they are in perfect condition.


Hairpin Flower Frogs

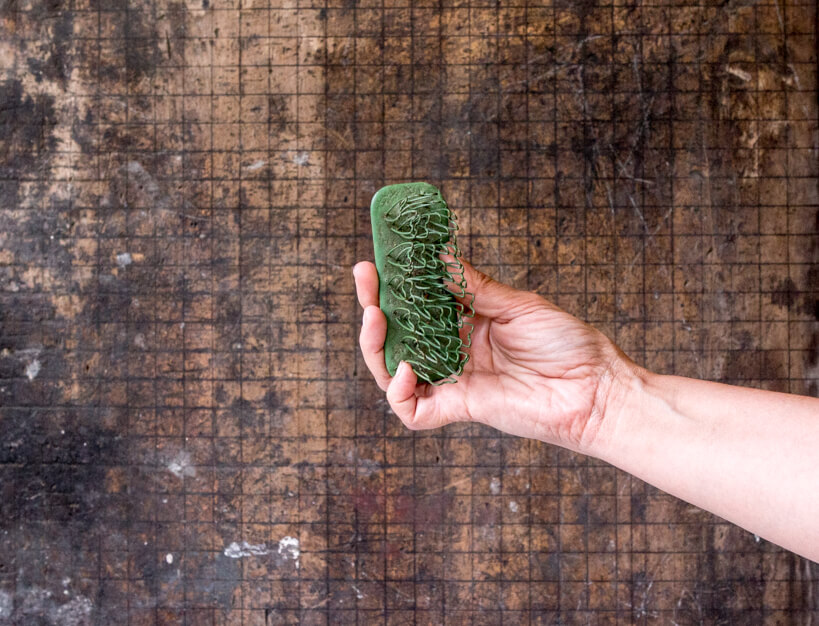
Hairpin flower frogs are made of bent metal. Bringing the best of both worlds, this style of flower frog provides rigidness of the pin frogs and allows spacing for thicker stems like the glass frog. Created by Ida Sinclair one afternoon after listening to the frustrations of designers at her garden club meeting. Her first prototype was made in her kitchen, consisting of a lead base and hairpins. She patented her Blue Ribbon Flower Holder in 1936.

This frog became very popular until the 50’s when the floral foam was introduced. This frog allows you to achieve a fuller and more dynamic design. For some reason, these are not easy for me to come by. Only recently did I find a couple, and I have collected flower frogs for a while now.

metal hairpin flower frog
Vintage Hairpin Frog
holding vintage flower frog

Vintage Cage Flower Frogs  

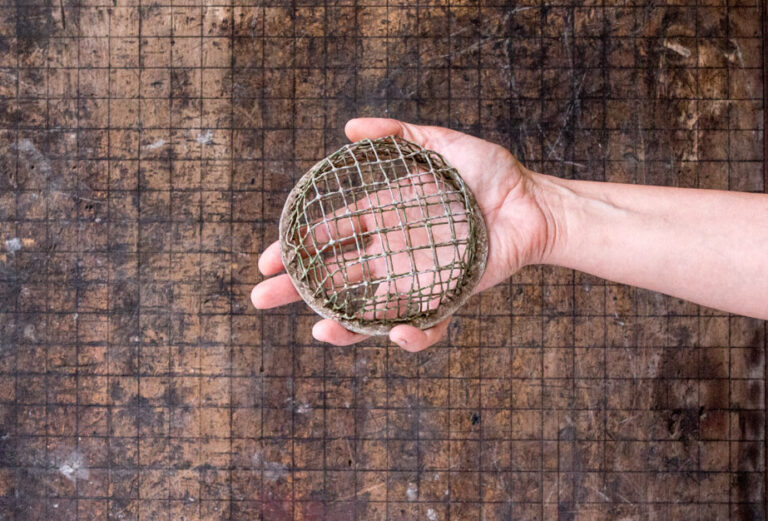
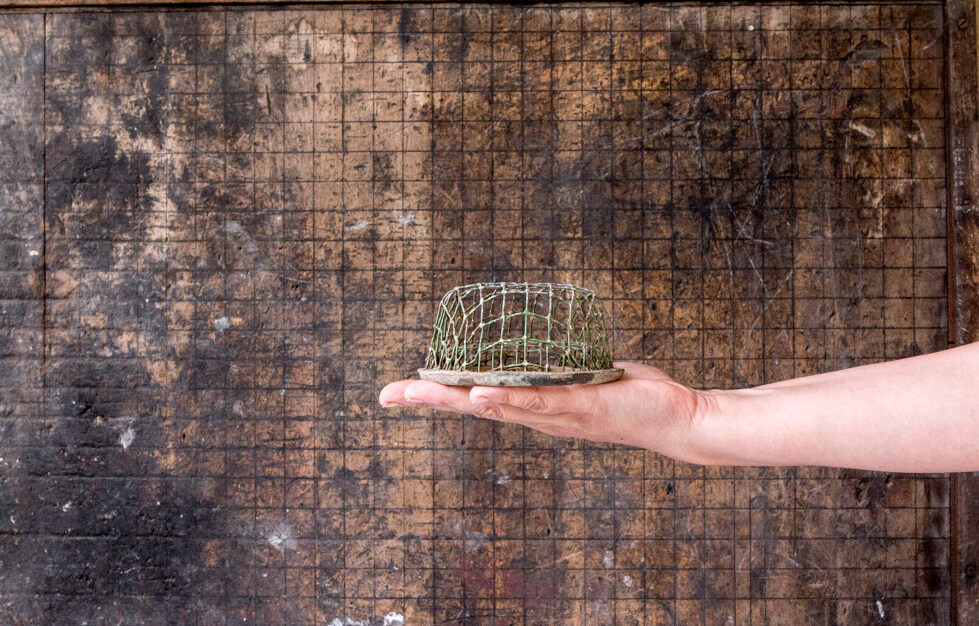
Cage flower frogs are again made of metal with a wider, stiffer opening  compared to the Hairpin Flower Frog. The whole/spaces are not as wide as the glass but they are stiffer than the hairpin frogs. As a designer, I like to design with cages. Today they make reusable plastic ones, but I prefer metal. I think because of the weight. It does a better job of holding the overall arrangement in place and it’s better for the environment.


green vintage cage flower frog top view
Vintage Cage Flower Frog
holding vintage cage flower frog

 Decorative Ceramic Flower Frogs

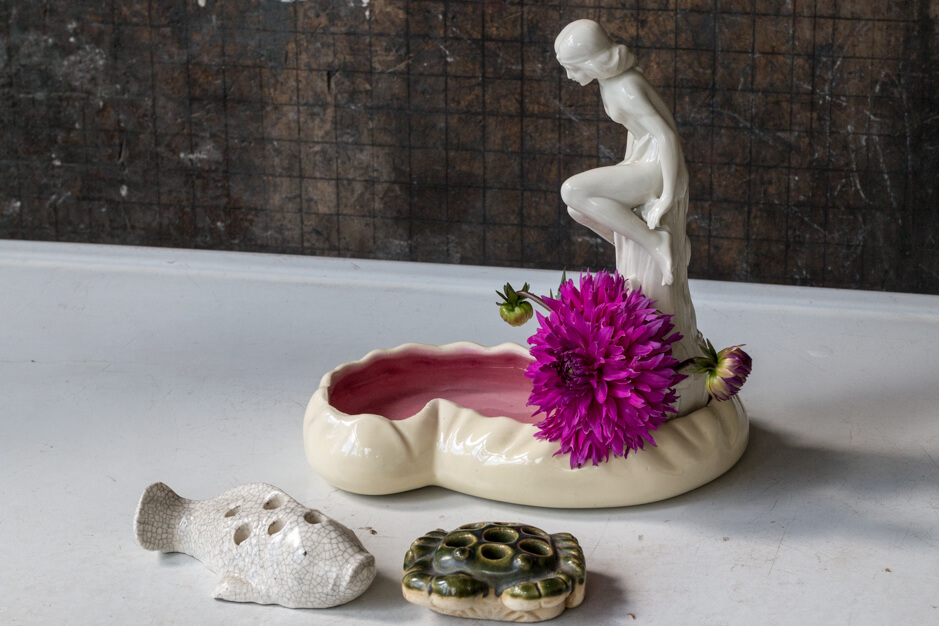
ceramic woman flower frog

Now come the decorative ceramic frogs.  They are typically more ornate and often whimsical. Modern-day ceramic frogs are more simple and utilitarian.  Of all the frog options, these are my least favorite. They are similar to glass frogs but lack the weight needed for arrangements.  For that reason, I find these to be the least useful.

fish and turtle flower frog
underside of flowerfrog

My other issue with these frogs is although beautiful, they take attention from the flowers.  Vintage frogs of this type are most often used decoratively to highlight a few glorious stems rather than a beautiful arrangement.  Perfect for your prized picks from your garden.  

naked women ceramic flower frog
Nude on rock with turtle. This would likely have had a matching dish.

Ceramic frogs became popular during the early 20th century, becoming more and more elaborate.  The book Flower Frogs For Collectors, by Bonnie Bull, is the most complete and comprehensive compilation of flower frogs.  If you are collecting frogs I recommend this book.  It is no longer in print, but you can still find copies on Amazon and eBay.  

Decorative ceramic flower frogs are harder to find because of their fragility. Of the three in my collection, 2 have chips. I find them often, but very rarely do I find them in perfect condition. 

Lead Flower Frogs

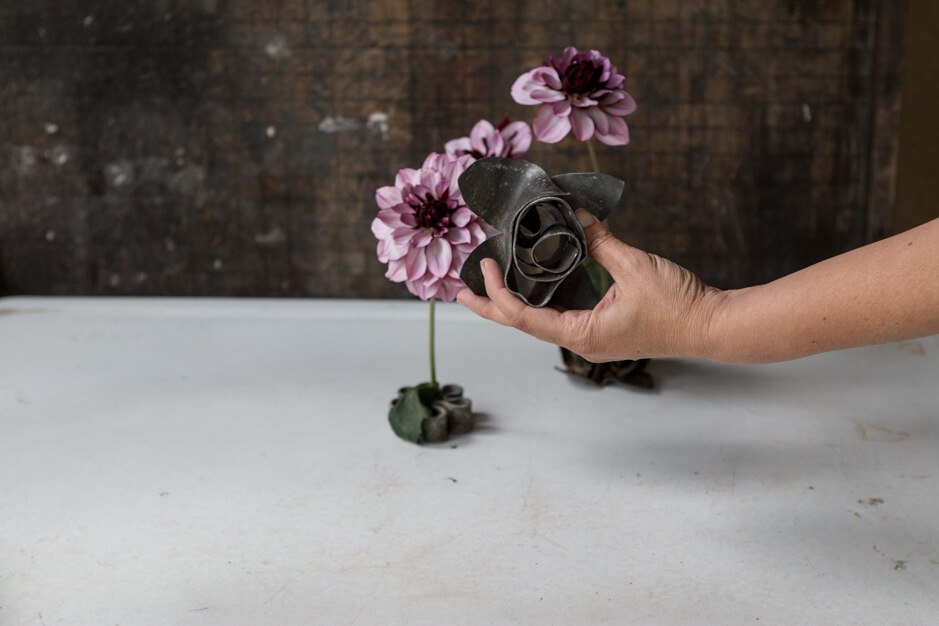
flowers in flower frog
lead dragon flower frog
dahlias lead flower frog
purple dahlias vintage flower frog

This frog is just one sheet of lead rolled into itself, providing space for stems that can be manipulated as needed.

collection of flower frogs

The most popular and most coveted for collections is the lead chrysanthemum shaped frog.  With the individual leaves easily manipulated, it is not only beautiful, but functional.

chrysanthemum lead flower frog
Lead Chrysanthemum Flower Frog

Metal Flower Frogs


This is another frog that is a little harder to find.  Both of the frogs above would have been silver plated,  They have lost a bit of their luster, but they are still beautiful in design and weight.  These are not the easiest frogs to use because you are fighting with the constrains of the shape, but unlike the ceramic frogs.  These frog are heavy and will hold your flowers beautifully.  They also look beautiful on there own and that’s why it’s special day when you find one.

metal flower frog with flowers


That sums up the different categories of flower frogs.  I am happy to have a least one from each category.  My flower frog collection has taken me years to compile.  I love to display and use these beauties, and urge folks to return back to frogs vs floral foam.  When using the right frog, you can have the same level of control as you do with foam.  There are also lots of new designs on the market today, which is exciting to see things changing in the floral design world. Happy hunting!

Collections – My Vintage and Antique Flower Frog Collection Read More »

farmhouse wedding decor

How to Upcycle an old typewriter new life – DIY

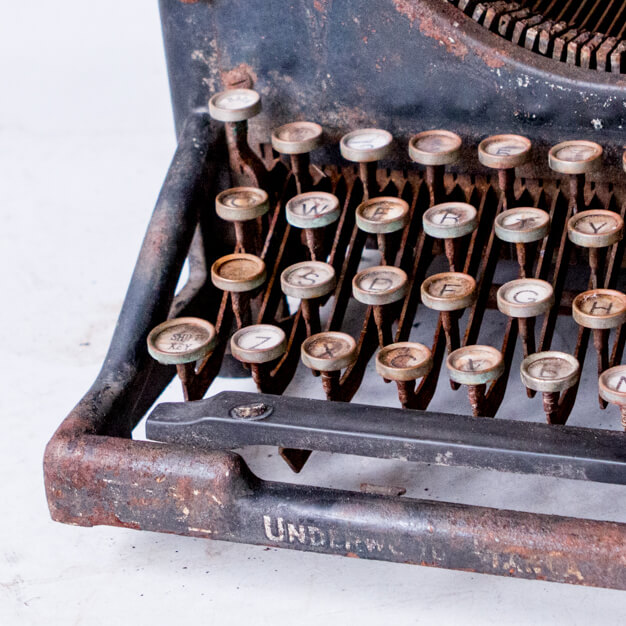
underwood typewriter keys

I recently found an antique Underwood No.5 typewriter that was so far gone, I couldn’t even salvage her for parts. I found her in an old barn that, well, let’s just say, it wasn’t exactly a weather-tight structure. So while it wasn’t left outside, it was pretty close. I considered using her as a planter, but two things prompted me to rethink that idea

First issue was that I left the typewriter outside, I figured it was already rusty.  But more rain made it your guessed it  rustier, and now the letter keys were illegible. So I knew that if this was to be kept outdoors, it would need some sort of topcoat to seal it and stop it from rusting anymore. It’s hard to spray poly on evenly, and I just didn’t want to deal with that. 

Type me an old letter
rusty typewriter keys

The second issue I had was that the open cavity in the typewriter would only hold one plant at best. And I was envisioning the typewriter overflowing with different types of cactus.  I love plants too much to put them in this cramped space, they won’t thrive in a space like this.

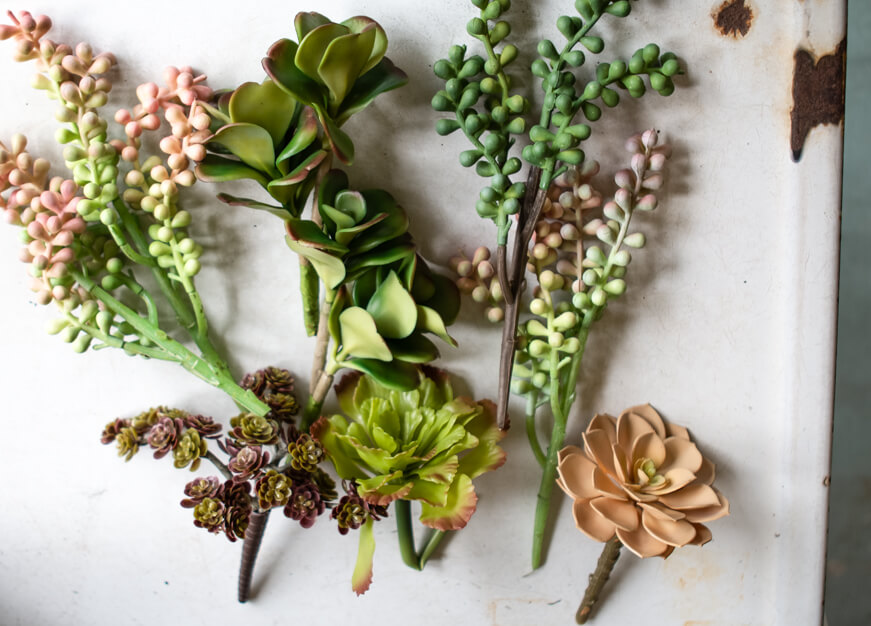
faux succulents michaels
The fix was to go with faux flowers and keeps it as an indoor decorative arrangement. Faux succulents, actually. I had found some great succulents at Michael's and was excited to get started.
diy faux succulents typewriter

Even rusty and dirty, she is a beautiful typewriter. I mean, I don’t know about you, but when I think of an antique typewriter, I think of a No. 5 Underwood typewriter.


The Underwood typewriter was invented by German-American inventor Franz X. Wagner in 1873. In 1906, the company was bought by John T. Underwood, who changed the name from “Wagner Typewriter Company” to “Underwood Typewriter Company.

What you need:

  • 8 stems of succulents
  • Hot Glue
  • Wire clippers
  • Reindeer moss

So here is the easiest tutorial you have ever read or watched. The hardest part of this DIY was finding the typewriter. A No. 5 Underwood might be hard to find in any condition, so don’t feel you have to find the same one.


For this simple DIY, it is really just a matter of cutting the stems (in some cases pulling the tops off is easier) and gluing the faux succulents in place.


Starting with the larger succulents first, I focused on the top cavity. I also made sure to have some of the trailing succulents drape out the front and side of the typewriter.  If your typewriter is in better condition and you are concerned with damaging it with hot glue.  You could just place the stems in the cavity without gluing the stems.  That way you are not hurting the typewriter and also you could swap out the flowers with the seasons.


As an after thought, I also added reindeer moss (not shown in the pictures) it filled in any holes or mechanics that were showing.

I think this would look great on a entry table at a country or farm style wedding.  If  you really like this look and you are really ambitious, this would be a fantastic centerpiece on a table.  That would of course require you to source a lot of old typewriters, which could be a daunting task.  Or you could intermix the tables with a typewriter centerpiece and book centerpiece.  If faux isn’t your thing you could create this look with fresh flowers and that would be so beautiful as well.

I hope you enjoyed the process.  I really love how the typewriter turned out.  I have displayed on a desk in my booth and I am really happy with the transformation.
How to Upcycle an old typewriter new life – DIY Read More »

Spring wreath green white

How To Make A Spring Tallow Berry Wreath – Tutorial

Happy Spring! Are you searching for new unique Spring wreath ideas?

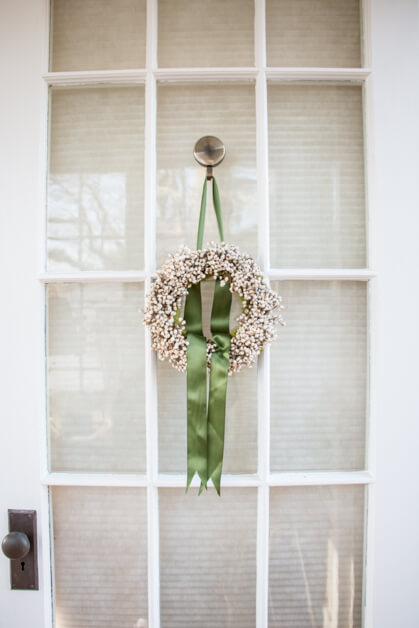
Nothing says welcome to Spring like a pretty spring wreath on your front door or in your home. If you’re looking for a modern and classic spring wreath design, you will love this tallow berry wreath.

Spring Tallow Berry Wreath Tutorial Video

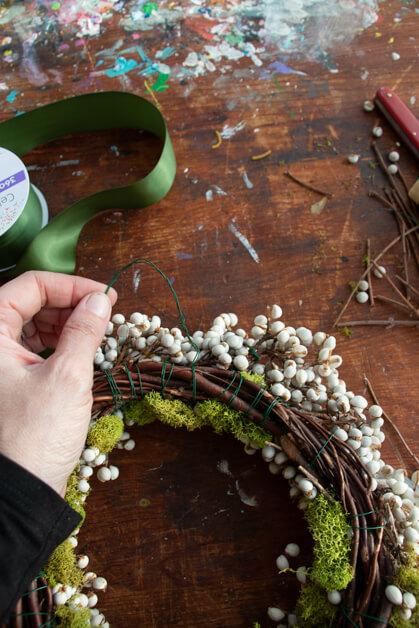
You can watch the video to see how I made this wreath. I started with a 8″ grapevine base that I purchased at the dollar store. (You can make this wreath in any size, but you will need more tallow berry for this full look). The finished wreath is 11″ in diameter so that the berries will bring a lot of volume to your wreath size. This wreath took 4 bunches of tallow berry to complete

grapevine wreath base tallow berry spring wreath idea

Once you have completed the wreath, you can either keep it simple or add ribbon.  If you do not want to add ribbon, you can add some wire to the back to hang the wreath.

tallow berry spring wreath idea

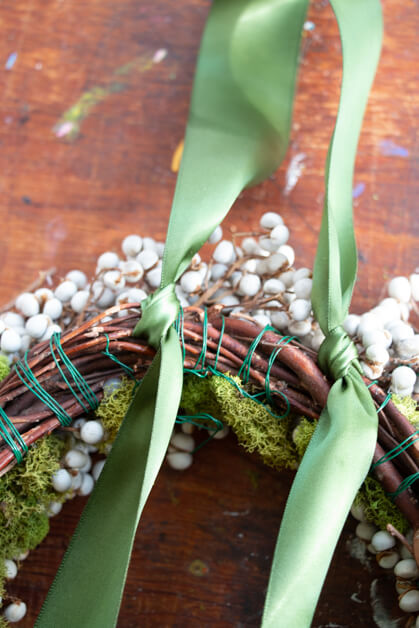
Typically I wouldn’t say I like bows on wreaths, but I do love a good ribbon. For this wreath, I opted to use a mossy green ribbon to bring out the green in the wreath and also as a way to hang the wreath. To use the ribbon method, flip the wreath over and slip one end of the ribbon through the grapevine and then do the same with the other end.

tallow berry wreath idea

I kept 3″ of ribbon at the top of the wreath, and made sure the streamers were even.  When you find the length you like, tie each side in a knot to hold the ribbon in place.  Then flip the wreath over and pull the ribbon streamers through the center of the wreath, finish the ribbon by cutting, folding the streamers in half, and cutting a triangle from the outside bottom edge to the top.  Then flip the wreath over and pull the ribbon streamers through the center of the wreath, finish the ribbon by cutting, folding the streamers in half, and cutting a triangle from the outside bottom edge to the top. 

tallow berry spring wreath idea

I also covered the back of the wreath with more reindeer moss. You could leave it, but covering the mechanics gives it a finished look. Also, if you decide to hang the wreath on a glass door or window where you would see both sides, you need to cover the mechanics. Here you can see what the finished back. Now I think it looks great from both sides.

tallow berry spring wreath ideas
tallow berry spring wreath idea

If this wreath is kept out of the elements, it will last for years and years. So no direct sunlight, moisture or heat.  I hope you enjoy making this wreath as much as I did. Please tag me in photos of your wreath, I would love to see them.

How To Make A Spring Tallow Berry Wreath – Tutorial Read More »

How to use a glass floral frog – Tulip Centerpiece

Vintage flower frogs are one of my favorite tools to use when creating floral arrangements. They became very popular in the early 1900’s, but they have been used for hundreds of years in floral design. They are still being manufactured today, but nothing beats the patina of a vintage flower frog. I was once in line checking out at an estate sale and happened to find a couple of flower frogs, the woman behind me commented, “flower frogs are worth their weight in gold,” and I couldn’t agree with her more.

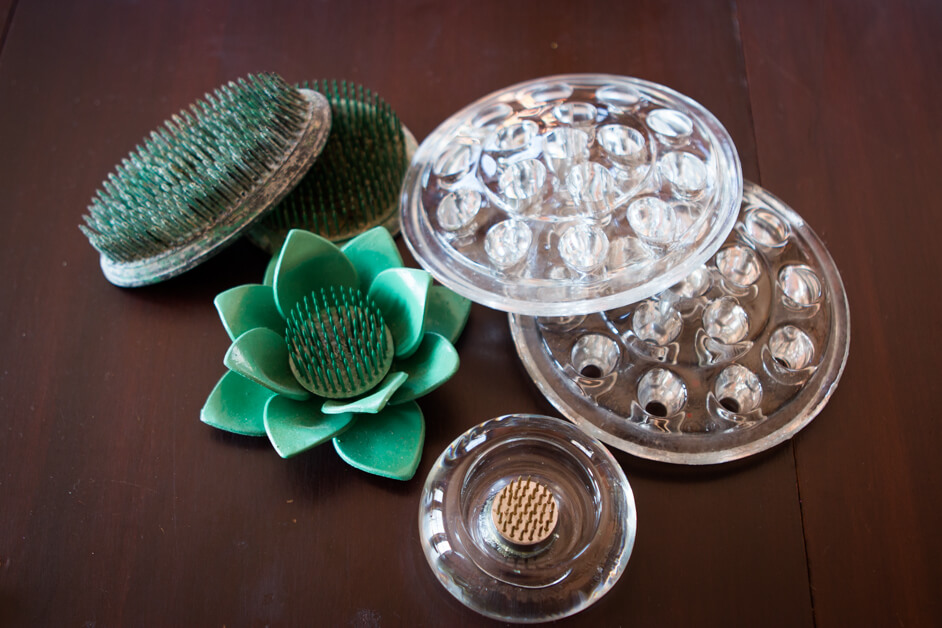
grouping of glass flower frogs

Why use a flower frog?

Mechanics are essential in any good floral design, and flower frogs provide a designer with the essential support that stems need in arrangements.  There are a few ways to do this, but flower frogs offer an eco-friendly way to floral design.  They are growing in popularity again as an alternative to the popular floral foam.  When floral foam first came out in the late fifties, it was the answer to every designer’s dreams.  It holds a lot of water, provides stem support, made transporting a dream, and flowers can last in foam for over a week.  


The problem is that floral foam is essentially plastic that is treated with detergents. It is not biodegradable, and as it breaks down, it does so as tiny particles that contribute to the world’s microplastic problem. You are here to learn about vintage flower frogs,  but I urge you to research the environmental impact that floral foam has on the environment and consider other alternatives.

collection flower frogs glass metal

Finding the right fit and material

Flower frogs come in all shapes and sizes, from metal to glass and ceramic. They made elaborate flower frogs in beautiful shapes and designs during Victorian times, but I think those really are only good to showcase one flower or a few stems. Metal pin frogs and glass frogs are the easiest to find and can often be found at flea markets and antique markets.


Ceramic and glass frogs with large holes lend themselves to flowers with thicker and Or Sturdy stems, like tulips and stock or woody stems like lilacs. 


In comparison, metal pin frogs are great for thinner stems and a more structural design. Metal pin frog, called Kenzan frogs used in the Japanese floral design style, called Ikebana, provide the support needed for this very architectural style of floral design. Personally, I love the control that it gives me in my designs, especially in today’s airy designs.  


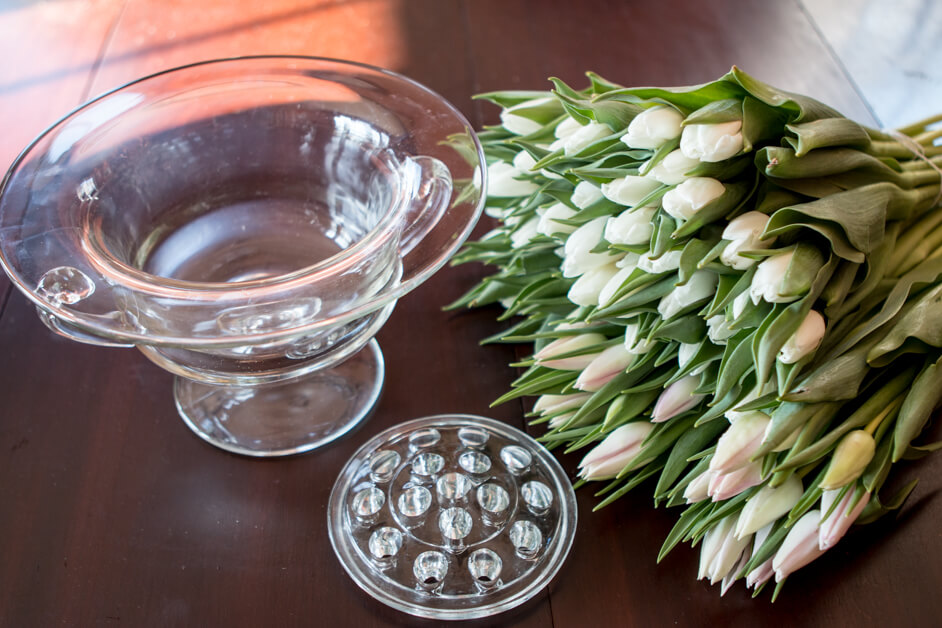
For this arrangement, I am using a beautiful Grecian-style urn with a very wide mouth.  The vase requires some sort of support mechanism to hold the flowers in place. While it’s technically possible to create the arrangement without any support, doing so would require a large quantity of flowers and result in a somewhat bulky appearance. To keep the focus on the flowers themselves, I’ve decided to use a glass flower frog as a support system.   It will support the this stems of the tulips perfectly and will blend in beautifully in the vase and will hardly be noticeable.

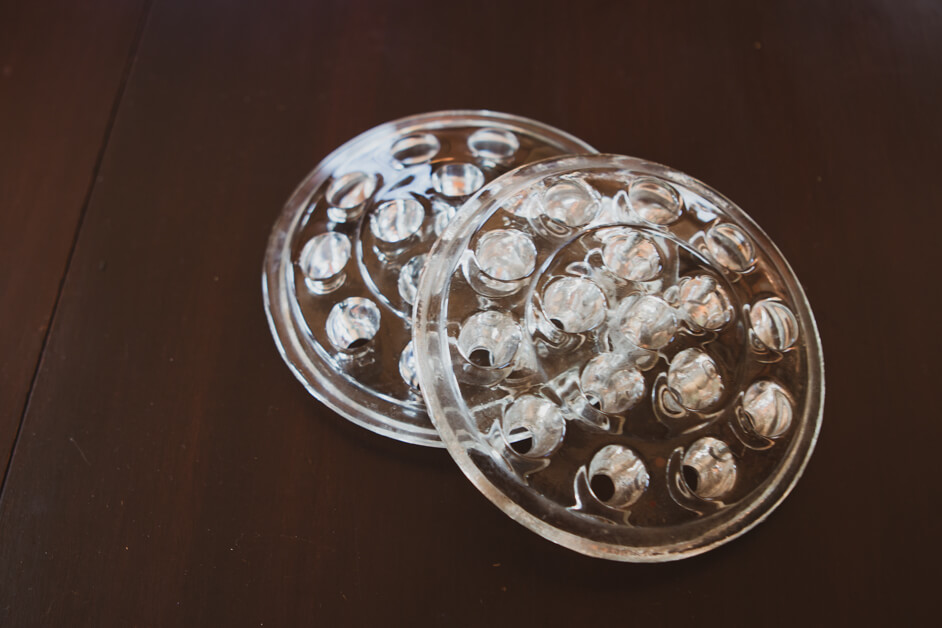
Vintage glass flower frog
Some say the name comes from the fact that the frog sits at the bottom of the vase like a real frog is often found sitting in water.

If you don’t have a flower frog, you have other options. You can also use curly willow stems to form a base in your vase, chicken wire, or tape the top of your vase to support your stems.

close up glass flower frog mechanics

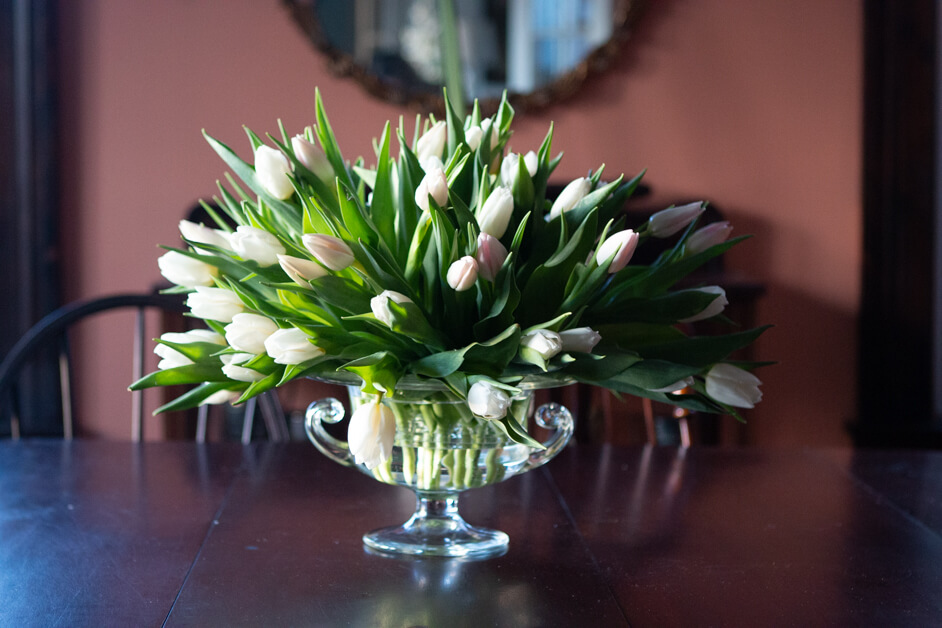
This frog measures 5″ and has 16 holes, just enough for the perfect foundation. To begin the arrangement, I fill each of the holes with one tulip stem. Once I have filled all the holes with stems, I fill all the empty space in the arrangement with the remaining flowers. This arrangement has 60 stems of tulips (thank you, Trader Joe’s), which is a lot but the arrangement is light and airy.

How To Design With A Glass Flower Frog

The visual learner that I am thought a video would be a good idea.  So I shot a quick YouTube video showing you how I created this tulip arrangement.  

The result is a beautiful clean, structured but airy, modern design. As you will see it’s not as intimidating as you thought it might be.  The hardest part would finding the right size frog for the right size vase.

Tulip centerpiece trader joes flowers glass frog

Collecting Vintage Floral Frogs

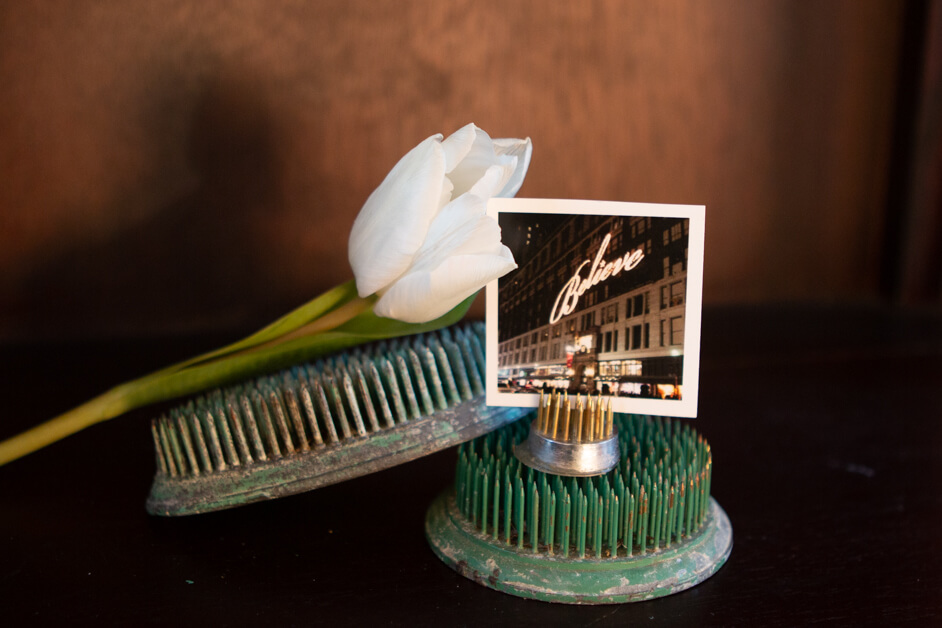
I hope that this inspires you to try an arrangement with a flower frog. And maybe it will also encourage you to start your own collection. They still have plenty of use in them and are inexpensive to collect. You can find vintage frogs anywhere from $5-20, depending on the size. I use them for flowers, but I also use them for photos and cards. It’s a great way to display small signs or table numbers. Some people use glass frogs for pens, brushes, and even scissors.

repurpose vintage flower frogs holding cards
vintage green metal flower frog with picture

My collection is growing and consists of various types of frogs.  I shared about my collection in a blog post, if you are interested you can check that out here.  Though I have quite a few frog it’s still fun an exhilarating to find flower frogs especially the rare and unique ones. 

How to use a glass floral frog – Tulip Centerpiece Read More »

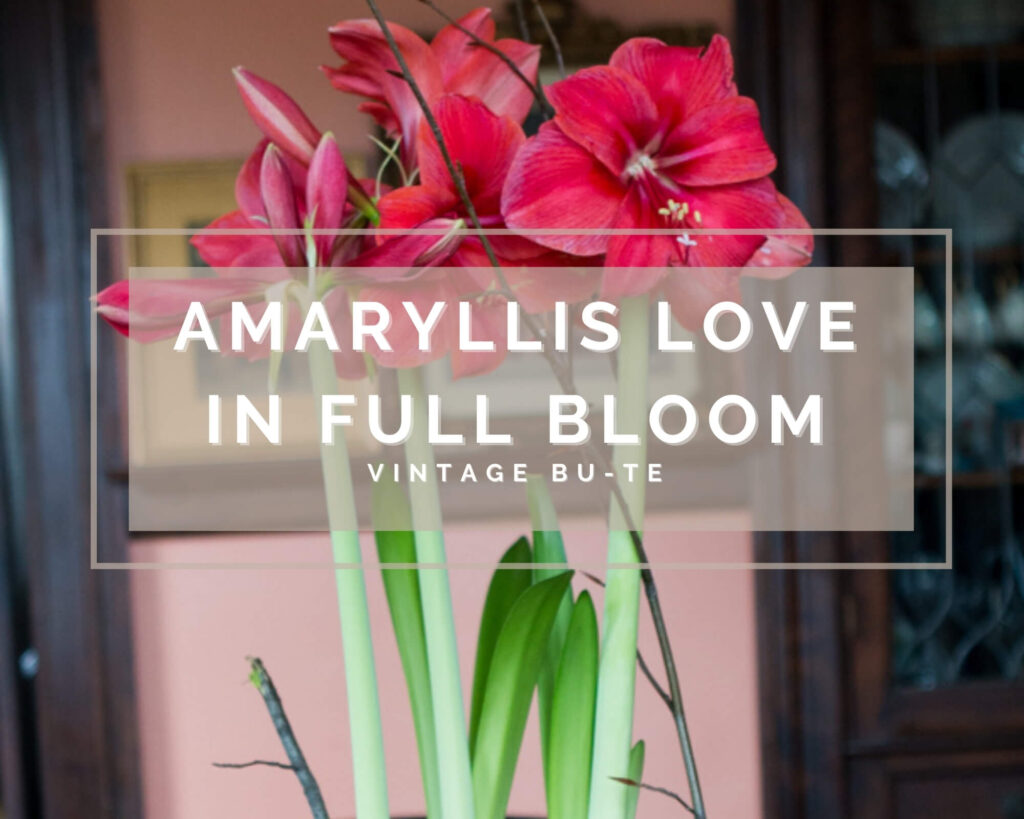
Forcing amaryllis Bulbs inside – Amaryllis love in full bloom

There have been a few good things that have come out of the Covid pandemic.  It has forced us, specifically me, to slow down.   As a wife, mother of 3, part-time marketing and manager, and small business owner, I am always super busy.  Covid has changed all of that significantly, and while I am still busy, I find myself with more time to do what has been on my to-do list forever.

On that list was to force amaryllis in the winter, and I finally did it after a little YouTube inspiration.  Two channels I especially love are Garden Answer and The Impatient Gardner. They have fantastic tips and information if you are looking to grow amaryllis yourself.  I had no idea how many varieties there were, and they are all just so glorious

Being in the antique business, I always come across unique pieces that can be used planters. I was eager to use some of these pieces to grow these beautiful flowers.    

I recently purchased this large vintage brass bowl (I’ve been a little obsessed with brass lately) at an estate sale.  It measures 14″ in diameter and is 6″ high.  Initially, I had no idea what I would use it for, but I loved the size and the patina.  Amaryllis were fresh on my mind after watch Laura from Garden Answers and was happy to find some on clearance at my local Walmart.  I thought they would look amazing in the vintage brass bowl and they did not disappoint.

Timing is everything when planting these bulbs.  It would be best if you planted them in October for December Bloom.   I did not stick to that timeline and planted some in mid November and a couple in early December.  It all worked out because then I have staggered bloom time.

I’m so happy with them. It’s been gratifying to grow these beautiful flowers, especially to pair them with beautiful pots and planters.

Now the challenge is can I get them to rebloom?


Forcing amaryllis Bulbs inside – Amaryllis love in full bloom Read More »

strawberry vanilla hydrangea end of summer color

Strawberry Vanilla Hydrangeas perfectly Paired

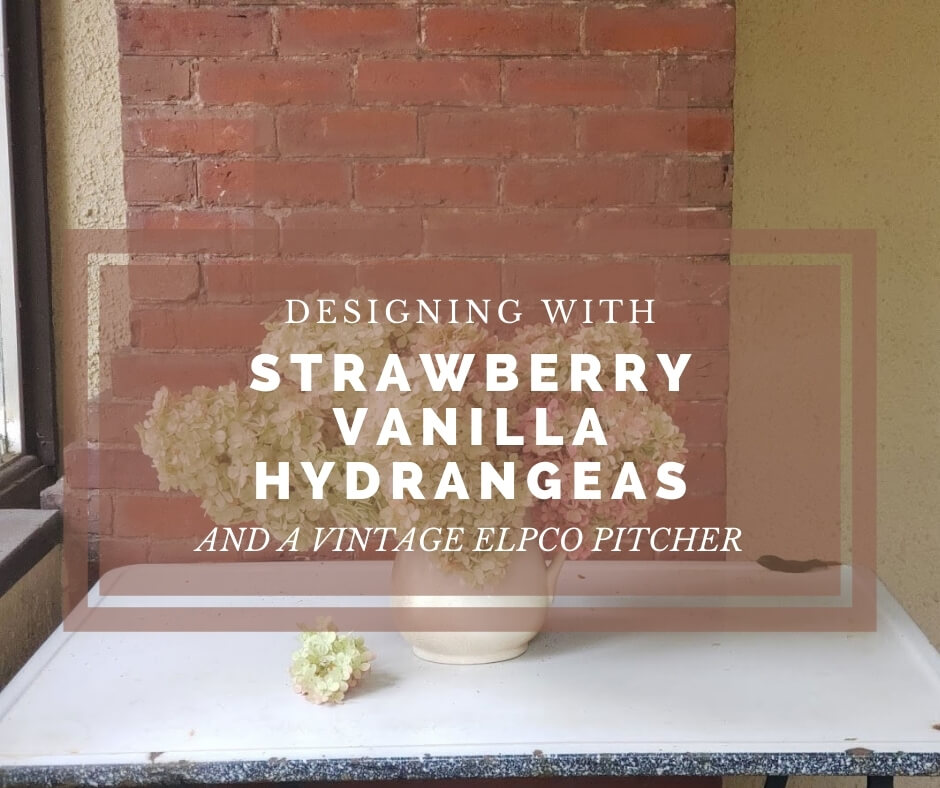
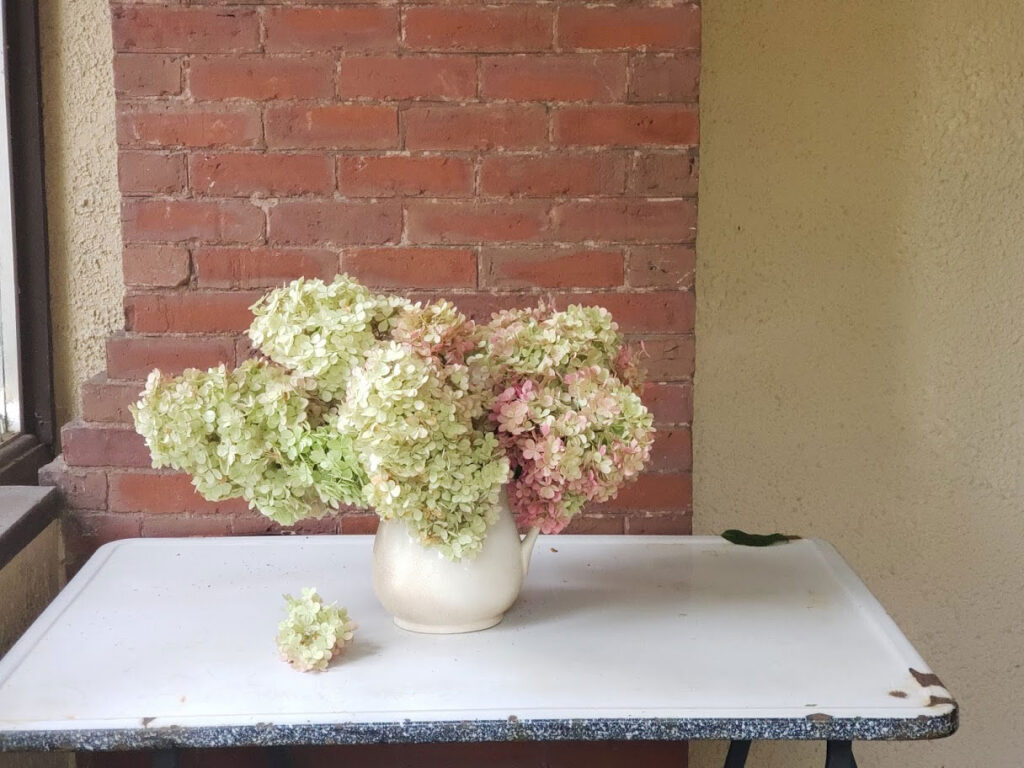
I have always been a fan of Hydrangeas.  And I have many types growing in my garden.  My favorite are my Strawberry Vanilla hydrangeas, they were a gift from my dad.  He has since passed but they hydrangeas remain a constant reminder of our shared love of gardening and flowers.

Every year they put on the most amazing show.  Lime green in the spring, creamy white in the peak days of summer and then they really turn it on come late August, September.  They start to turn a beautiful creamy, mauvy pink and I just love them.  

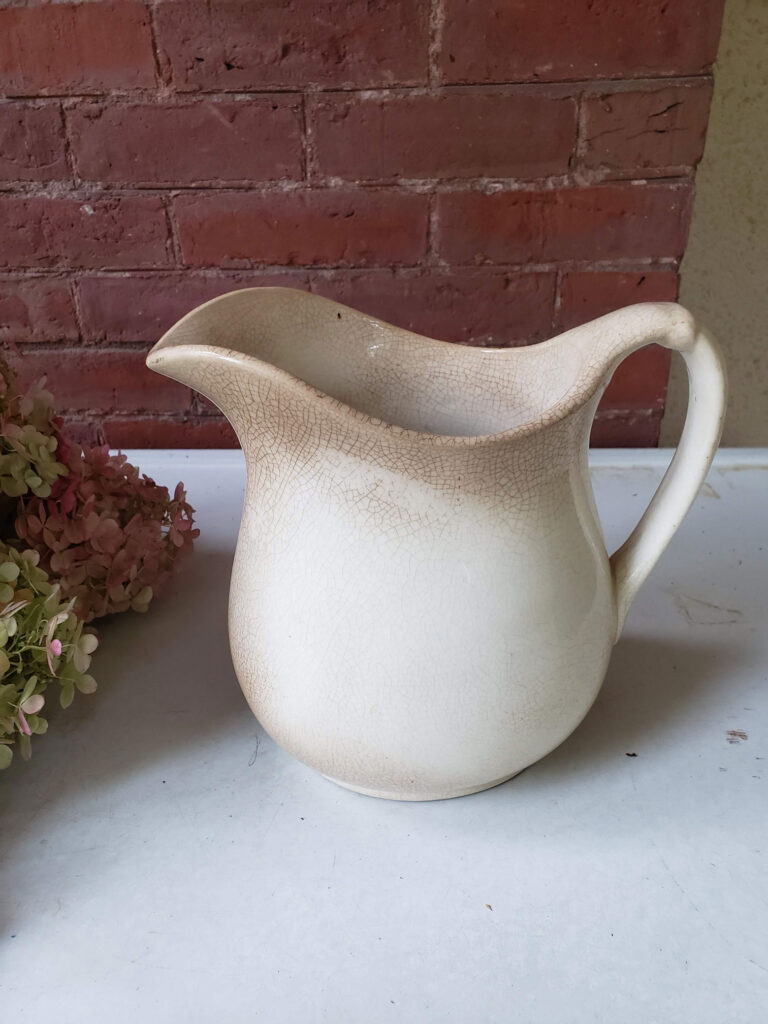
vintage pitcher with crazing
vintage ironstone crazing
end of summer strawberries cream hydrangea

When I found this beautiful ELPCO pitcher I knew just what to put in it.  Actually it didn’t need to put anything in it, because it was so lovely on it’s own.   You have to admit that these two are perfectly paired.

Strawberry Vanilla Hydrangeas perfectly Paired Read More »

Welcome!

Welcome to Vintage Bu-Te! I am so glad you are here! A little bit about why I decided to start this blog. Fact is, I am a creative being the thrives on creating and designing. This blog is a way to document that journey.

I went to college, studied digital arts, and while in school, I took a part time job as a floral designer. I ended up loving flowers more than school, and part-time eventually became full time. Over the years, I worked in a few shops to learn the ropes and eventually had my own design studio that I ran out of my home. When the kids came, I decided to be a full-time stay at home mom, but I always had a side hustle on Etsy.


Along the way, I caught the bug for antiques and picking, and soon enough, I rented my first booth space at a local antique co-op, and that was it.  I found a place to stage these fantastic finds, and then I could sell them!  

That’s where I am now. I’m an antique dealer with a floral background, and my style blends the beauty of these two worlds.  The patina of time mixed with the beauty and freshness of plants and flowers. 

Thanks for being here and being a part of this journey!


Welcome! Read More »