DIY

easter bunny in wheat grass

Growing your own real Easter Grass

easter bunny in wheat grass

I have wanted to grow grass for Easter baskets, and I finally did it this year. More importantly, it truly turned out beautiful. I have a long list of crafts and DIY projects. It will take me until I am 90 before I complete them all, but I am happy to say that I can check this one off my list. And I will do it again. What screams spring more than grass?

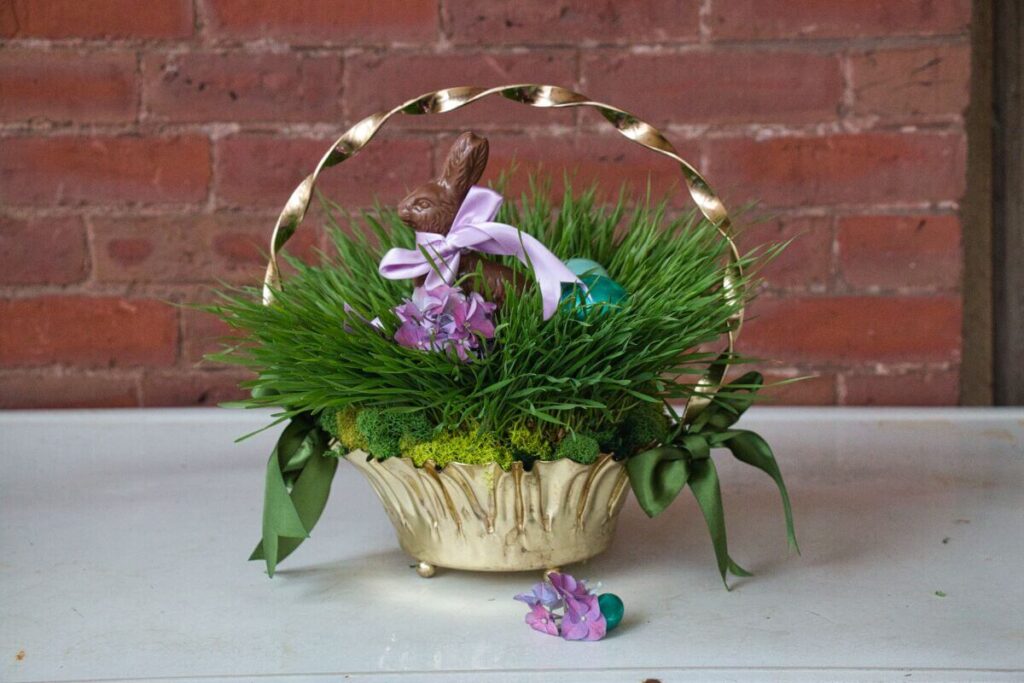
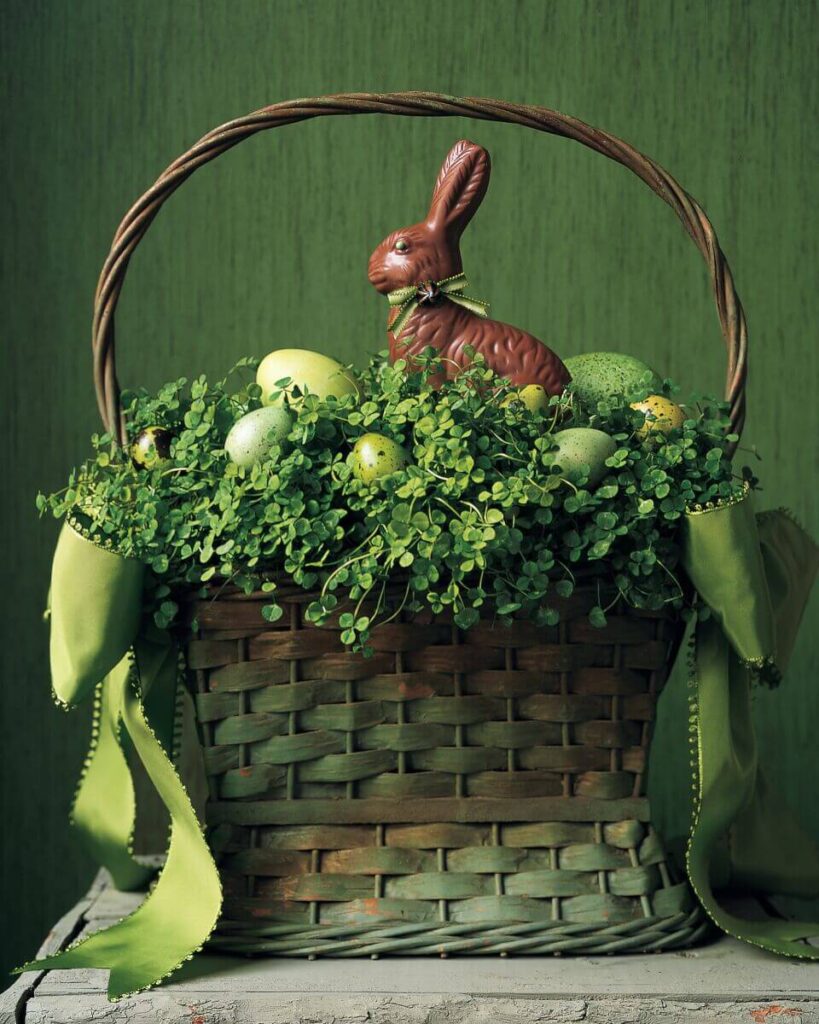
I could see it in my mind’s eye. A beautiful basket of lush green grass, with a lovely chocolate bunny nestled in the middle. I’m so happy that this DIY came out just as I had envisioned it. This is a great thing to do with kids because it’s easy and has beautiful and gratifying results.
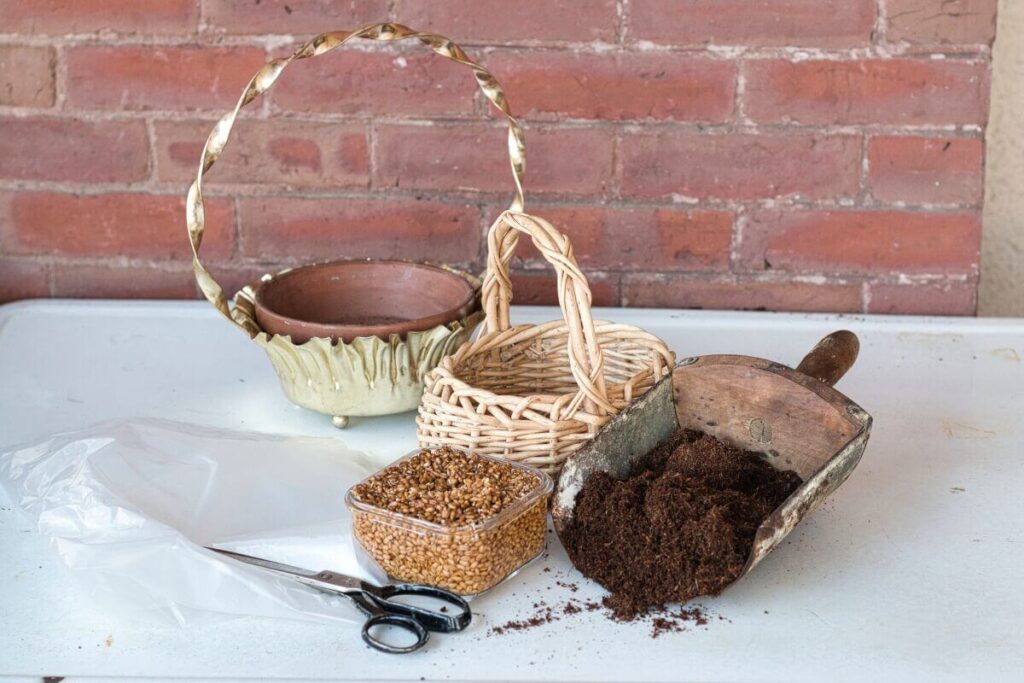
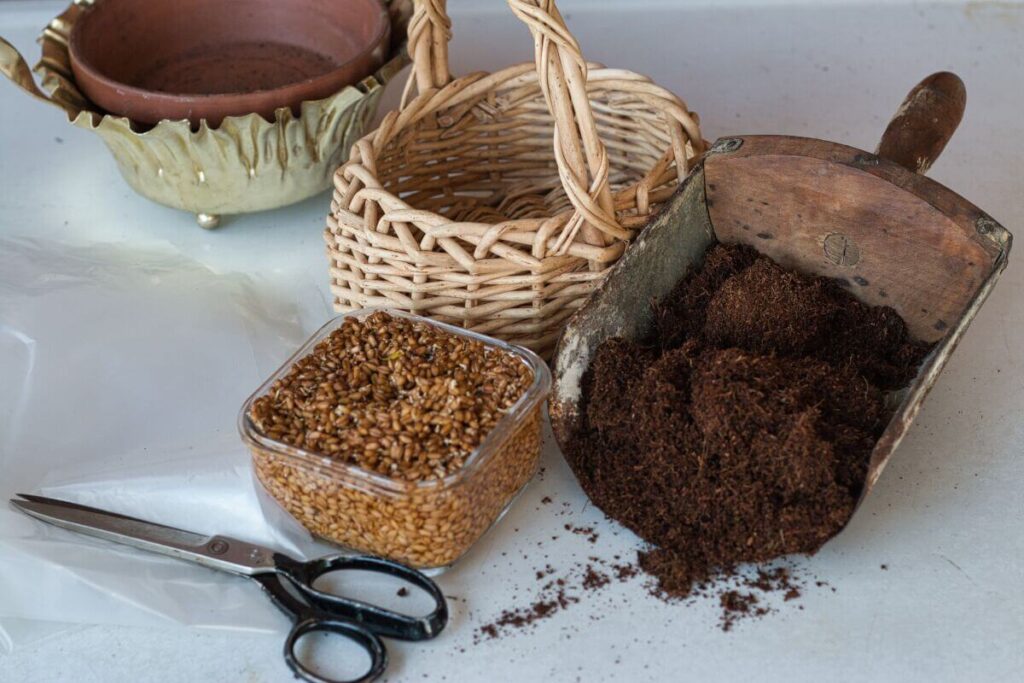
wheat great easter decoration

Supplies:

  • Container of your choice
  • Wheatgrass
  • Organic Coco Coir Potting Soil
  • Plastic to lined container if needed
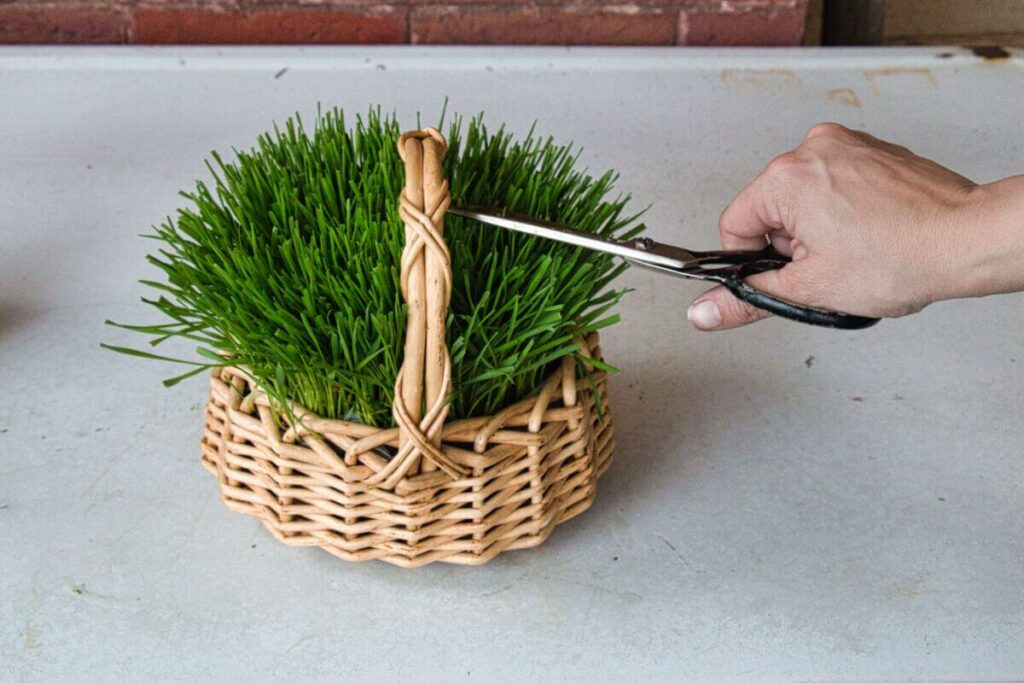
  • Scissors

How to grow your Easter Grass

This is the easiest thing you will ever do with the most amazing result. 

Step 1:  

soak wheatgrass seeds for 1-2 days.
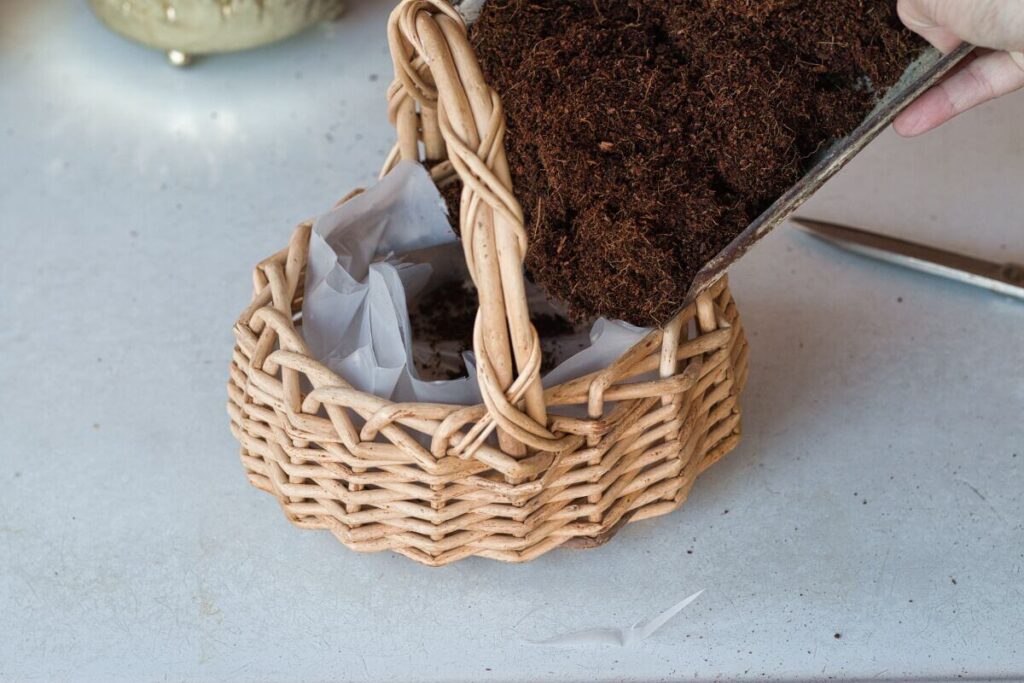
Step 2:  

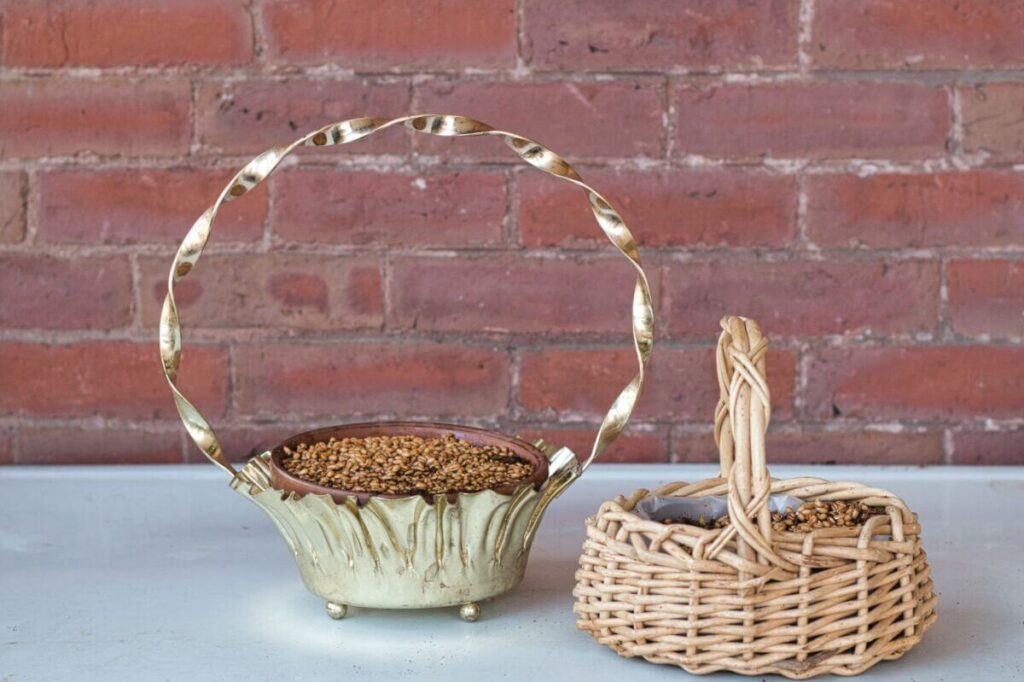
Prepare your container.  I had to line my basket with plastic.  And my metal basket was lined with a terracotta pot.  I could have also used a plastic liner, but the terracotta fit perfectly.  Once your container is ready, fill it with potting soil.
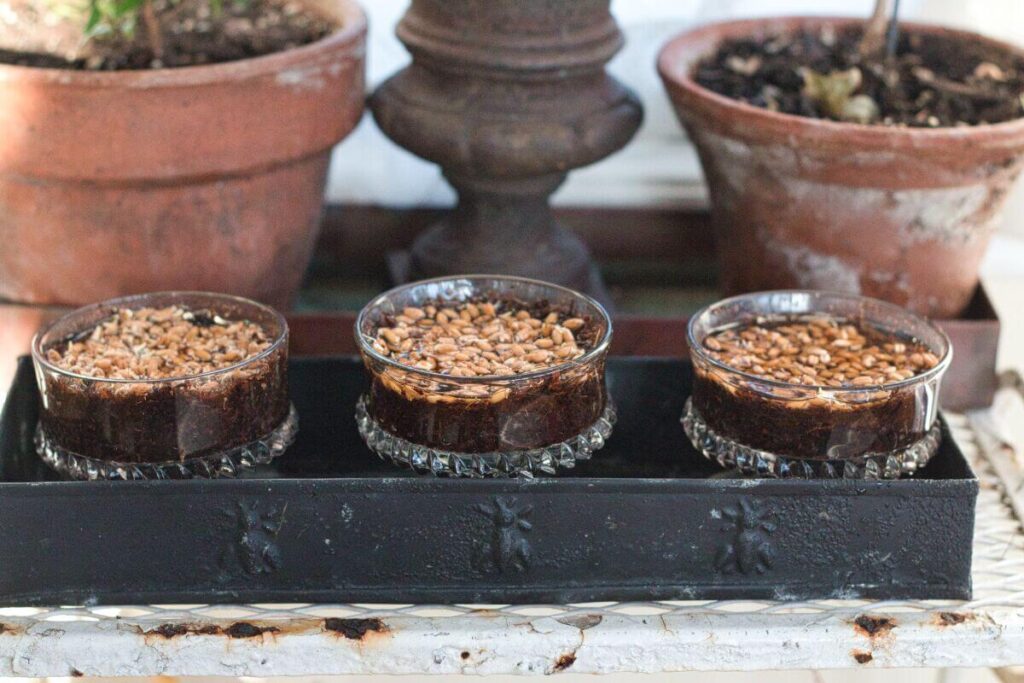
wheat grass for decor
tutorial grow wheat grass easter basket
potting soil for wheat grass

Step 3:

Sow the wheatgrass in potting soil and water (make sure to keep the soil moist), place it in a sunny location and wait.  That’s it.

watering wheat grass
mcm basket for decor metal

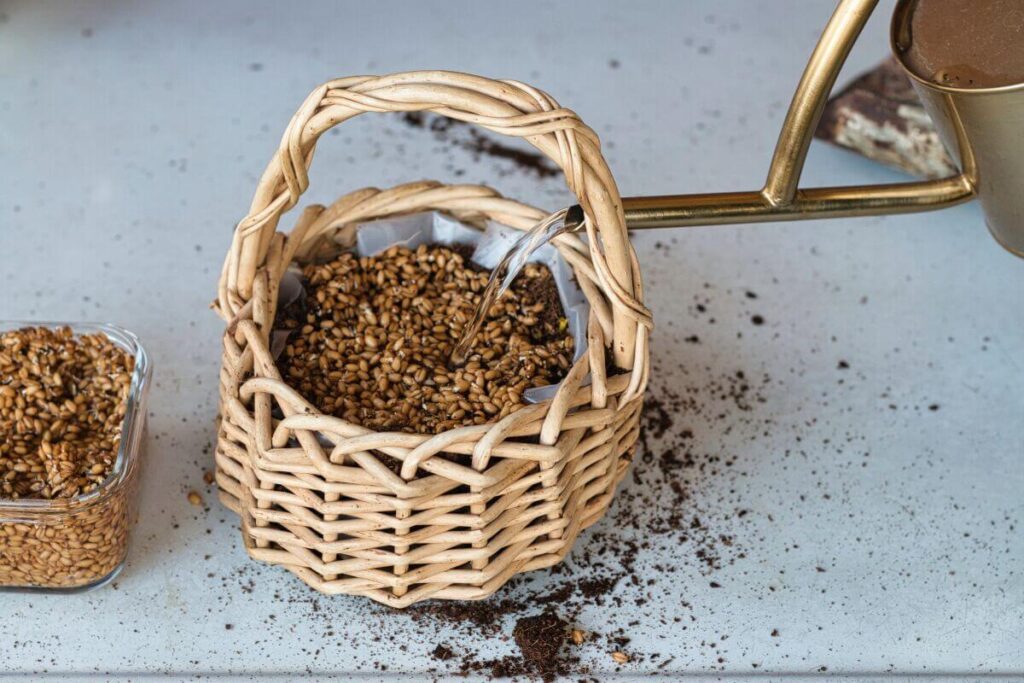
Because you have already soaked the wheatgrass, they are plump and full of water, ready to burst and take root. The seeds should start sprouting in about 3 to 5 days.

growing wheat grass for decore
wheat grass for decoration

then the magic happens

grow wheat grass dessert dish
centerpieces with wheat grass
wheat grass for table

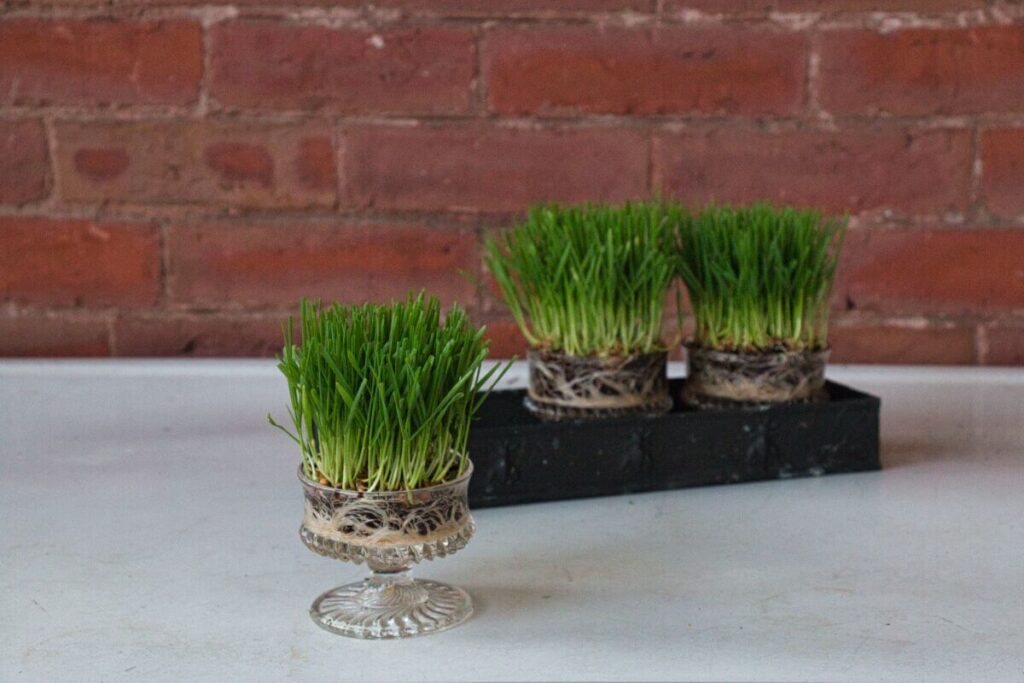
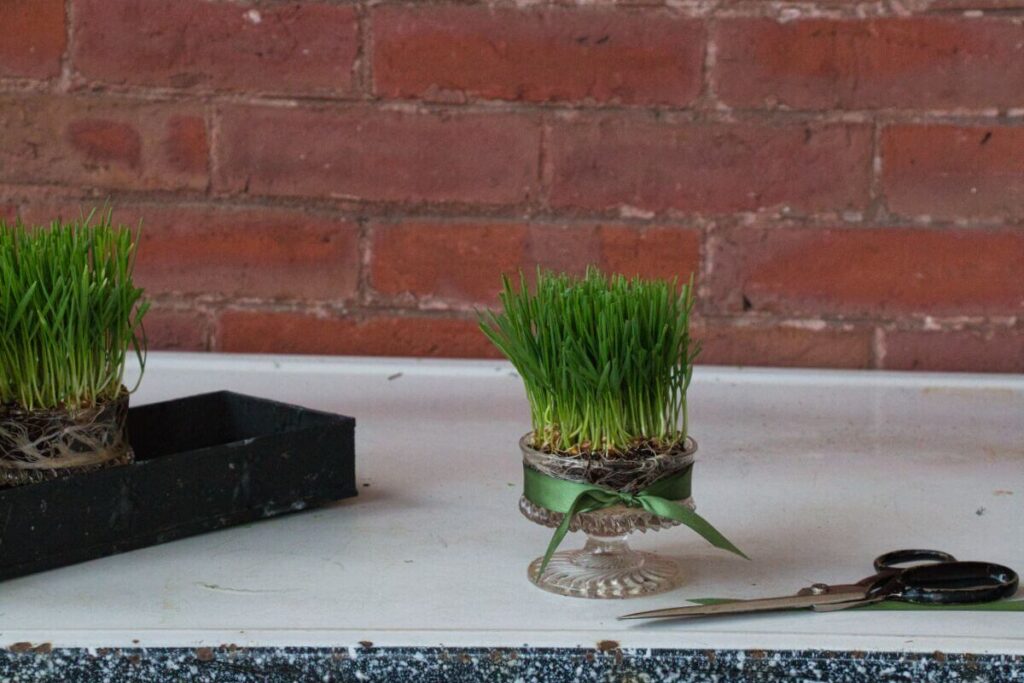
Once it starts growing, it will keep growing, and at some point, your will need to trim your grass. Wheatgrass is full of nutrients and can be grown to eat.

growing wheat grass trimming
easter tablescape
Easter grass grown in dessert glasses on my Easter table.
easter bunny in wheat grass

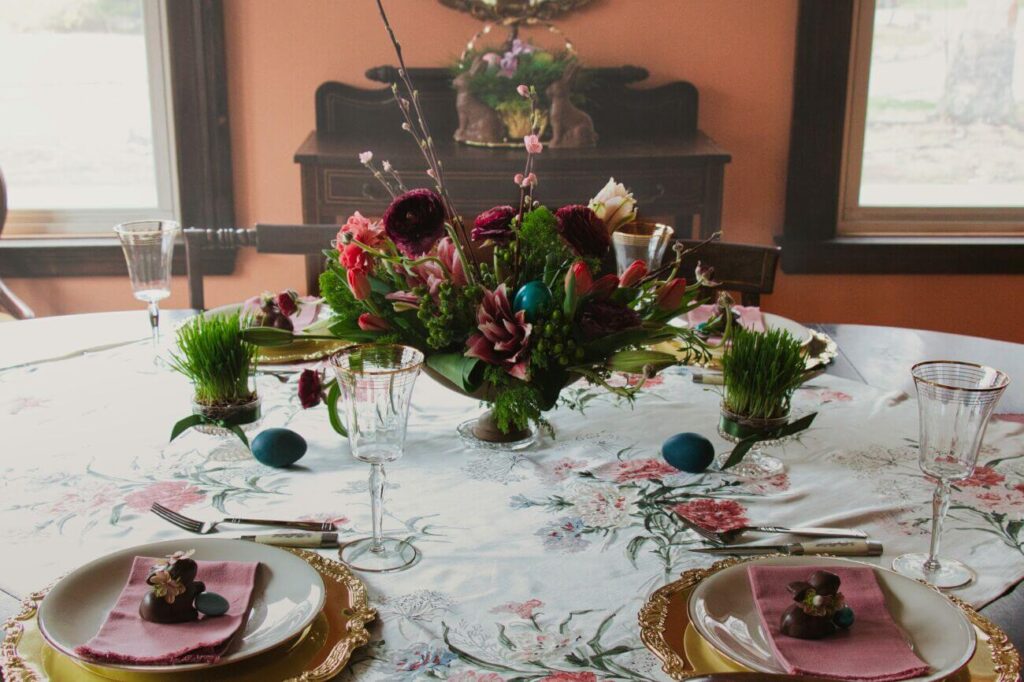
I added a chocolate bunny and some eggs to the mcm metal basket.  Of all the containers this one was my favorite, it reminded me of a Martha Stewart cover.  It’s not exactly the same, but you can see the resemblance.  The shamrocks in Martha’s basket are amazing maybe I will try that next year.

martha stewart green basket

I’m so happy with the way they turned out.  Timing is everything for this craft, you need to give yourself 4 weeks to get these results, but they are absolutely worth it.

Growing your own real Easter Grass Read More »

Halloween Witch’s Broom – DIY Tutorial

For me, Halloween is a time to celebrate my inner witch.  And every year, I strive to transform my home into a witch’s den. I try to stick to a theme because I think that the look has more impact when you have a theme. You’ve already seen my Martha Stewart cutout witch, and she’s the centerpiece of my Halloween decor.

So this year, I wanted to play up the whimsical and use a lot of brooms and witch’s hats. When I looked I could not find a witch’s broom that I liked. It was a goldilocks scenario. Everything I found was either too small, not full enough, or plastic.

To get the look I wanted, I realized that I would need to make my own. I have created a quick video tutorial to show you how I made my brooms. This broom is purely decorative and is made out of a birch branch and twigs. I ended up embellishing the broom because it needed a little something extra.  

Here is what you will need:

  • Natural Birch Twigs – I bought mine through Amazon. This link is to a box of 4 bundles. Enough for two brooms
  • Birch branch for the handle – 48″ in length, 2′ in diameter, but you can choose to make your broom handle longer or shorter, and it doesn’t have to be birch.  Choose any branch that is long enough for the handle. I recommend going for a hike and finding your perfect handle.  The more bends and knots the better.
  • Twine
  • Hot Glue Gun
  • Scissors/clippers

I started the first layer by gluing twigs to the lower portion of the branch about 6 inches from the bottom. After the first layer was glued down, I then wrapped it with twine and followed with another layer of branches and then wrapped them again with twine.  The key is to line up the ends of the branches so the it looks nice and neat.

 At this point, the broom is done, but I prefer a fuller look, so I glued individual branches to give it a fuller look. You can leave the broom plain like this, but I felt like it needed a little something.

I added cedar roses, end of summer hydrangea (that means is already starting to dry on the plant, great for dry arrangements), and a few sprigs of black sparkly branches from a Halloween pick. 

And even after that, I felt it still needed something. So I took a little chalk paint and lightly went over all of the edges of the pinecones, hydrangea, and the twine.

But then it was too dark, so I went over everything with a bit of gold gilding wax to brighten it a touch. The final result is a slightly gilded and aged broomstick. I’m thrilled with the way it turned out.  It’s spooky and pretty.

cedar rose pinecones on witch broom
halloween witch decor

Above is a shot of the broom in my booth.  I hung it above a fireplace mantle and love how it looks. 

This is another version of the broom I made, but in this version I added some sparkly black and orange Halloween picks from the dollar store.  It looked great on  it’s on, but what can I say I am sucker for anything sparkly.

I hung this broom in my portico, keeping with my witch’s den theme.  

I love my Hocus Pocus banners, the black and orange works perfectly with my theme and they are perfect over my sidelights. 

Thank you for stopping by, if you end up making your own broom be sure to share it on social media and tag me, I would love to see your brooms!

Halloween Witch’s Broom – DIY Tutorial Read More »

farmhouse wedding decor

How to Upcycle an old typewriter new life – DIY

underwood typewriter keys

I recently found an antique Underwood No.5 typewriter that was so far gone, I couldn’t even salvage her for parts. I found her in an old barn that, well, let’s just say, it wasn’t exactly a weather-tight structure. So while it wasn’t left outside, it was pretty close. I considered using her as a planter, but two things prompted me to rethink that idea

First issue was that I left the typewriter outside, I figured it was already rusty.  But more rain made it your guessed it  rustier, and now the letter keys were illegible. So I knew that if this was to be kept outdoors, it would need some sort of topcoat to seal it and stop it from rusting anymore. It’s hard to spray poly on evenly, and I just didn’t want to deal with that. 

Type me an old letter
rusty typewriter keys

The second issue I had was that the open cavity in the typewriter would only hold one plant at best. And I was envisioning the typewriter overflowing with different types of cactus.  I love plants too much to put them in this cramped space, they won’t thrive in a space like this.

faux succulents michaels
The fix was to go with faux flowers and keeps it as an indoor decorative arrangement. Faux succulents, actually. I had found some great succulents at Michael's and was excited to get started.
diy faux succulents typewriter

Even rusty and dirty, she is a beautiful typewriter. I mean, I don’t know about you, but when I think of an antique typewriter, I think of a No. 5 Underwood typewriter.


The Underwood typewriter was invented by German-American inventor Franz X. Wagner in 1873. In 1906, the company was bought by John T. Underwood, who changed the name from “Wagner Typewriter Company” to “Underwood Typewriter Company.

What you need:

  • 8 stems of succulents
  • Hot Glue
  • Wire clippers
  • Reindeer moss

So here is the easiest tutorial you have ever read or watched. The hardest part of this DIY was finding the typewriter. A No. 5 Underwood might be hard to find in any condition, so don’t feel you have to find the same one.


For this simple DIY, it is really just a matter of cutting the stems (in some cases pulling the tops off is easier) and gluing the faux succulents in place.


Starting with the larger succulents first, I focused on the top cavity. I also made sure to have some of the trailing succulents drape out the front and side of the typewriter.  If your typewriter is in better condition and you are concerned with damaging it with hot glue.  You could just place the stems in the cavity without gluing the stems.  That way you are not hurting the typewriter and also you could swap out the flowers with the seasons.


As an after thought, I also added reindeer moss (not shown in the pictures) it filled in any holes or mechanics that were showing.

I think this would look great on a entry table at a country or farm style wedding.  If  you really like this look and you are really ambitious, this would be a fantastic centerpiece on a table.  That would of course require you to source a lot of old typewriters, which could be a daunting task.  Or you could intermix the tables with a typewriter centerpiece and book centerpiece.  If faux isn’t your thing you could create this look with fresh flowers and that would be so beautiful as well.

I hope you enjoyed the process.  I really love how the typewriter turned out.  I have displayed on a desk in my booth and I am really happy with the transformation.

How to Upcycle an old typewriter new life – DIY Read More »

Spring wreath green white

How To Make A Spring Tallow Berry Wreath – Tutorial

Happy Spring! Are you searching for new unique Spring wreath ideas?

Nothing says welcome to Spring like a pretty spring wreath on your front door or in your home. If you’re looking for a modern and classic spring wreath design, you will love this tallow berry wreath.

Spring Tallow Berry Wreath Tutorial Video

You can watch the video to see how I made this wreath. I started with a 8″ grapevine base that I purchased at the dollar store. (You can make this wreath in any size, but you will need more tallow berry for this full look). The finished wreath is 11″ in diameter so that the berries will bring a lot of volume to your wreath size. This wreath took 4 bunches of tallow berry to complete

grapevine wreath base tallow berry spring wreath idea

Once you have completed the wreath, you can either keep it simple or add ribbon.  If you do not want to add ribbon, you can add some wire to the back to hang the wreath.

tallow berry spring wreath idea

Typically I wouldn’t say I like bows on wreaths, but I do love a good ribbon. For this wreath, I opted to use a mossy green ribbon to bring out the green in the wreath and also as a way to hang the wreath. To use the ribbon method, flip the wreath over and slip one end of the ribbon through the grapevine and then do the same with the other end.

tallow berry wreath idea

I kept 3″ of ribbon at the top of the wreath, and made sure the streamers were even.  When you find the length you like, tie each side in a knot to hold the ribbon in place.  Then flip the wreath over and pull the ribbon streamers through the center of the wreath, finish the ribbon by cutting, folding the streamers in half, and cutting a triangle from the outside bottom edge to the top.  Then flip the wreath over and pull the ribbon streamers through the center of the wreath, finish the ribbon by cutting, folding the streamers in half, and cutting a triangle from the outside bottom edge to the top. 

tallow berry spring wreath idea

I also covered the back of the wreath with more reindeer moss. You could leave it, but covering the mechanics gives it a finished look. Also, if you decide to hang the wreath on a glass door or window where you would see both sides, you need to cover the mechanics. Here you can see what the finished back. Now I think it looks great from both sides.

tallow berry spring wreath ideas
tallow berry spring wreath idea

If this wreath is kept out of the elements, it will last for years and years. So no direct sunlight, moisture or heat.  I hope you enjoy making this wreath as much as I did. Please tag me in photos of your wreath, I would love to see them.

How To Make A Spring Tallow Berry Wreath – Tutorial Read More »

How to use a glass floral frog – Tulip Centerpiece

Vintage flower frogs are one of my favorite tools to use when creating floral arrangements. They became very popular in the early 1900’s, but they have been used for hundreds of years in floral design. They are still being manufactured today, but nothing beats the patina of a vintage flower frog. I was once in line checking out at an estate sale and happened to find a couple of flower frogs, the woman behind me commented, “flower frogs are worth their weight in gold,” and I couldn’t agree with her more.

grouping of glass flower frogs

Why use a flower frog?

Mechanics are essential in any good floral design, and flower frogs provide a designer with the essential support that stems need in arrangements.  There are a few ways to do this, but flower frogs offer an eco-friendly way to floral design.  They are growing in popularity again as an alternative to the popular floral foam.  When floral foam first came out in the late fifties, it was the answer to every designer’s dreams.  It holds a lot of water, provides stem support, made transporting a dream, and flowers can last in foam for over a week.  


The problem is that floral foam is essentially plastic that is treated with detergents. It is not biodegradable, and as it breaks down, it does so as tiny particles that contribute to the world’s microplastic problem. You are here to learn about vintage flower frogs,  but I urge you to research the environmental impact that floral foam has on the environment and consider other alternatives.

collection flower frogs glass metal

Finding the right fit and material

Flower frogs come in all shapes and sizes, from metal to glass and ceramic. They made elaborate flower frogs in beautiful shapes and designs during Victorian times, but I think those really are only good to showcase one flower or a few stems. Metal pin frogs and glass frogs are the easiest to find and can often be found at flea markets and antique markets.


Ceramic and glass frogs with large holes lend themselves to flowers with thicker and Or Sturdy stems, like tulips and stock or woody stems like lilacs. 


In comparison, metal pin frogs are great for thinner stems and a more structural design. Metal pin frog, called Kenzan frogs used in the Japanese floral design style, called Ikebana, provide the support needed for this very architectural style of floral design. Personally, I love the control that it gives me in my designs, especially in today’s airy designs.  


For this arrangement, I am using a beautiful Grecian-style urn with a very wide mouth.  The vase requires some sort of support mechanism to hold the flowers in place. While it’s technically possible to create the arrangement without any support, doing so would require a large quantity of flowers and result in a somewhat bulky appearance. To keep the focus on the flowers themselves, I’ve decided to use a glass flower frog as a support system.   It will support the this stems of the tulips perfectly and will blend in beautifully in the vase and will hardly be noticeable.

Vintage glass flower frog
Some say the name comes from the fact that the frog sits at the bottom of the vase like a real frog is often found sitting in water.

If you don’t have a flower frog, you have other options. You can also use curly willow stems to form a base in your vase, chicken wire, or tape the top of your vase to support your stems.

close up glass flower frog mechanics

This frog measures 5″ and has 16 holes, just enough for the perfect foundation. To begin the arrangement, I fill each of the holes with one tulip stem. Once I have filled all the holes with stems, I fill all the empty space in the arrangement with the remaining flowers. This arrangement has 60 stems of tulips (thank you, Trader Joe’s), which is a lot but the arrangement is light and airy.

How To Design With A Glass Flower Frog

The visual learner that I am thought a video would be a good idea.  So I shot a quick YouTube video showing you how I created this tulip arrangement.  

The result is a beautiful clean, structured but airy, modern design. As you will see it’s not as intimidating as you thought it might be.  The hardest part would finding the right size frog for the right size vase.

Tulip centerpiece trader joes flowers glass frog

Collecting Vintage Floral Frogs

I hope that this inspires you to try an arrangement with a flower frog. And maybe it will also encourage you to start your own collection. They still have plenty of use in them and are inexpensive to collect. You can find vintage frogs anywhere from $5-20, depending on the size. I use them for flowers, but I also use them for photos and cards. It’s a great way to display small signs or table numbers. Some people use glass frogs for pens, brushes, and even scissors.

repurpose vintage flower frogs holding cards
vintage green metal flower frog with picture

My collection is growing and consists of various types of frogs.  I shared about my collection in a blog post, if you are interested you can check that out here.  Though I have quite a few frog it’s still fun an exhilarating to find flower frogs especially the rare and unique ones. 

How to use a glass floral frog – Tulip Centerpiece Read More »